
Introduction
The Setup overview step is where an installed and licensed copy of ARVO Studio is made ready for work. This article gives you a clear path through it, in the order the fields depend on each other, and links each step to the detailed article for that group of fields.
Work through the steps in order and although some steps are shorter than others, creating the two identities and wiring them in is the longest part of the work. The last two steps confirm that the whole configuration holds together correctly.
Important: ARVO Studio installs and runs in sandbox environments only. Production receives only the approved solution app through gated promotion, and neither ARVO Studio nor the test app is ever installed there.
Note: AI runs on the customer’s own Azure AI Foundry deployment or Anthropic account and is paid for by the customer. Bluefort does not resell, supply or absorb AI capacity, and AI usage is not included in the ARVO fee.
Before you start
Have the following in place before you open Setup.
- ARVO Studio is installed in the target sandbox, as described in Install ARVO Studio from AppSource.
- An environment entitlement has been activated against that sandbox and tenant, as described in Activate an environment.
- The customer has an Azure AI Foundry deployment or an Anthropic account ready to use, with the connection details and a key to hand.
- You have the details for the two required identities, or access to an administrator who can create them.
The correct setup path
- Prove that the licence is active. On ARVO Studio Setup, check that Activation field shows as Activated then choose Test Bluefort Connection and confirm a healthy result. This is covered in Bluefort Connection.

- Connect one AI provider, either Azure AI Foundry or Anthropic. Configure one connection only, following Your Azure AI (BYO) or Your Anthropic API (BYO).


- Create the two required identities, the Test Identity and the Orchestrator. Each one is an application registration in Microsoft Entra with a matching application user in Business Central, and this is the longest part of setup. Follow Test Identity and Orchestrator.
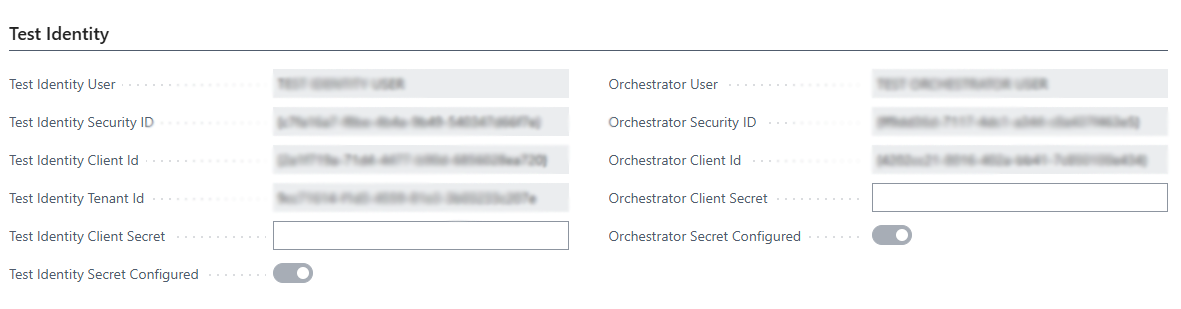
- Wire both identities into the Test Identity group on ARVO Studio Setup, choosing each application user and entering the tenant id and the two client secrets. This is covered in the same article.
- Set the object range and prefix so that generated objects stay inside the range reserved for that environment. This is covered in Object Generation and Token Estimation.
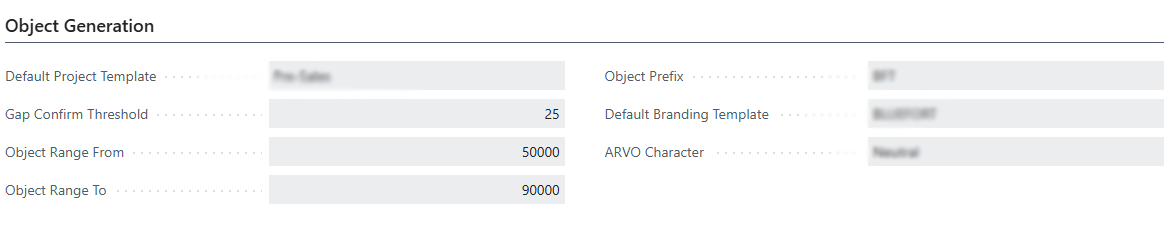
- Review the token-estimation defaults, so that the estimate shown before a build reflects what the customer actually consumes. This is covered in the same article, Object Generation and Token Estimation.

- Confirm that AI Operations Enabled is on for the environment. See Kill switches and Test Connection.

- Run Test Connection and work through anything it reports, using the message table in Kill switches and Test Connection.
- Finish with Run Smoke Test, from the Testing menu, which confirms that the testing setup of the environment works from end to end. This is covered in Kill switches and Test Connection.
What success looks like
Setup is complete when all of the following are true.
- Activation field shows as Activated.
- Exactly one AI connection is enabled, and its key indicator shows that a key is stored.
- Both identities show that a client secret is stored.
- AI Operations Enabled is on.
- Test Connection completes without reporting an action for you to take.
- The most recent smoke test run shows status Passed.