1. Home
  2. Bluefort Payments
  3. Getting Started
  4. Bluefort TAPP Payment Automation for Microsoft Dynamics 365 Sales – Deployment

Bluefort TAPP Payment Automation for Microsoft Dynamics 365 Sales – Deployment

TAPP for Microsoft Dynamics 365 Sales – Deployment and Configuration

Introduction

This page explains how you can get TAPP for Microsoft Dynamics 365 Sales deployed and configured in your Microsoft Dynamics 365 Sales Environment. Contact Bluefort support on support@bluefort.eu if you have any questions.

Pre-requisites

In order to successfully deploy this product you need to have a Microsoft Dataverse environment with a database and Microsoft Dynamics 365 Sales app deployed.

It is recommended to conduct testing, training and integration testing with any other solutions in a test environment first before using the software on a production environment.

Bluefort TAPP CRM ERP requires TAPP Finance March 2024 Wave 1 or later to be deployed on the D365 Finance/FSCM environment that will be linked to the Dataverse environment. Additionally, the solutions listed below must be installed before installing any of the Bluefort TAPP CRM ERP solutions.

1. Dual-write core solution

2. Dual-write Application Core Solutions

3. Dual-write Finance Solutions

4. Dynamics 365 HR Common Tables

5. Dual-write Human Resources solution

6. Dual-write Supply Chain solution

7. Dual-write Asset Management Solutions

The above are all free dual write solutions downloadable from Microsoft AppSource.

Which TAPP Product type for Microsoft Dynamics 365 Sales?

Bluefort has two different TAPP products for Microsoft Dynamics 365 Sales. One is called Bluefort TAPP and the other one is called Bluefort TAPP ERP.

Bluefort TAPP

Bluefort TAPP should be deployed when you are using Microsoft Dynamics 365 CE/CRM/Dataverse applications only without integration with Microsoft Dynamics 365 ERP. This solution works entirely within Microsoft Dynamics 365 CRM / CE / Sales.

Bluefort TAPP ERP

If your deployment consists of both Microsoft Dynamics 365 CE/CRM/Dataverse and Microsoft Dynamics 365 Finance and Operations / FinOps / FSCM applications then you should deploy Bluefort TAPP ERP. Bluefort TAPP ERP has all the necessary company and dual-write dependencies to communicate to Microsoft Dynamics 365 Finance and Operations / FinOps / FSCM applications using Microsoft’s dual-write technology. However, it provides limited functionalities on the CRM side when compared to Bluefort TAPP because it is assumed that the bulk of the financial operations will happen within the ERP system not the CRM side.

Note: For Bluefort TAPP ERP to work, it must be ensured that on the Microsoft Dynamics 365 Finance and Operations / FinOps / FSCM side you either have Bluefort TAPP Finance deployed -or- LISA BusinessPro deployed on the environment that is linked to Dataverse via dual-write. These hyperlinks lead you to the deployment instructions for each of these products.

Obtaining the Software for Bluefort TAPP (no ERP)

The Software can be downloaded from Microsoft AppSource. These are the high-level steps:

  1. Browse to Microsoft AppSource.
  2. Make sure you are logged in to AppSource with a user from the same tenant where you would like to install TAPP for Microsoft Dynamics 365 Sales.
  3. Click on the Install Now button.
  4. Confirm your detail and click on the Install button.
  5. You are now automatically re-directed to Power Platform admin center.
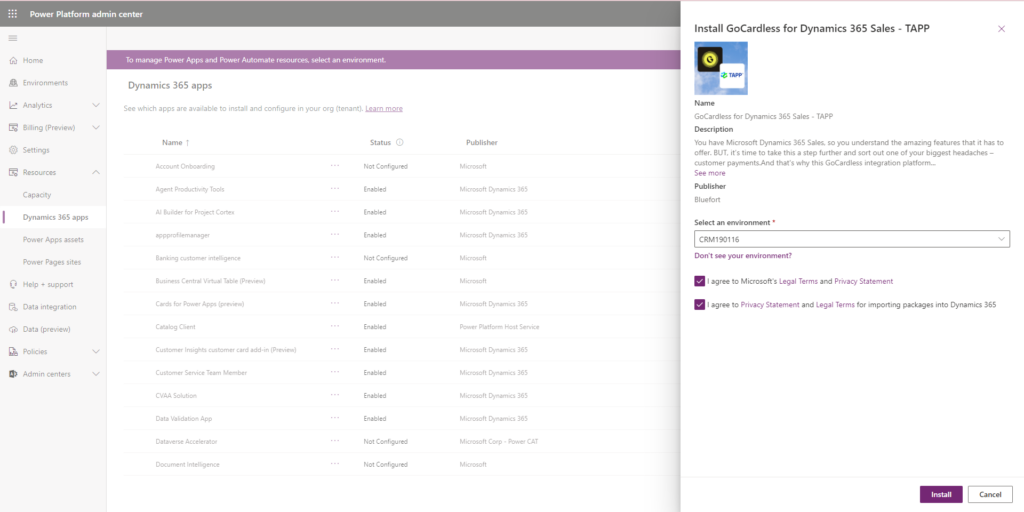
  6. Within Power Platform admin center, select the target environment where you want to install the software, agree to the legal terms and privacy statements and click on the Install button.
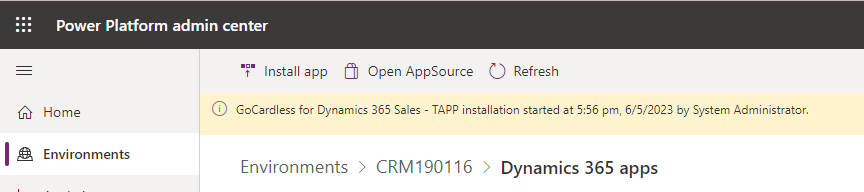
  7. The installation will start within Power Platform admin center.

Obtaining the Software for Bluefort TAPP ERP

Steps

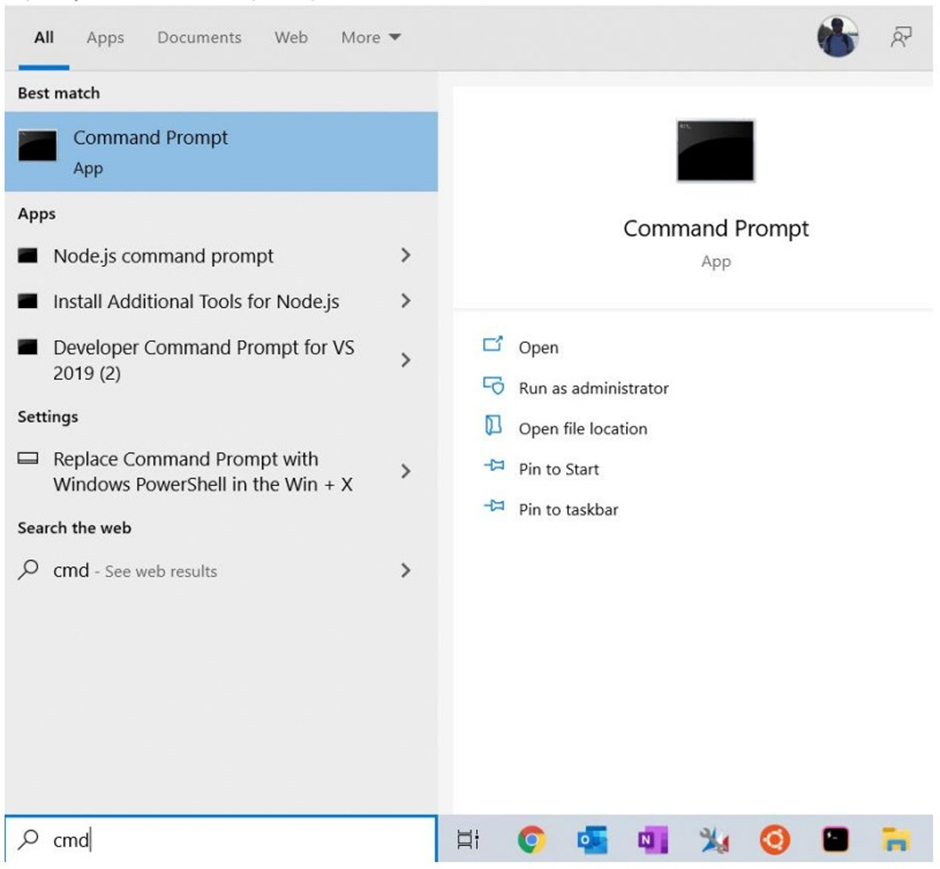
  1. Open your command prompt
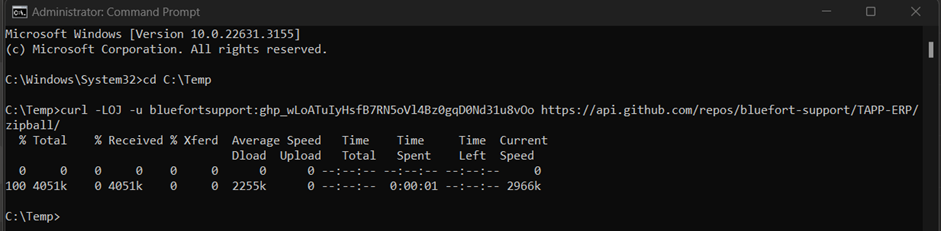
  1. Copy the Bluefort TAPP ERP package from GitHub executing the following command
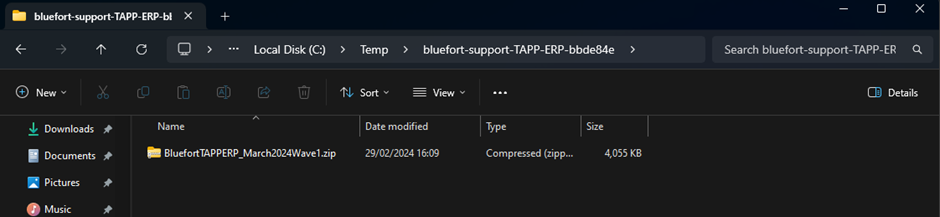
  1. Check if the download was successful
  1. Unzip the contents by executing the following command: tar -xf [FILEPATH]
  1. A folder should be made available containting all the releases for Bluefort TAPP ERP
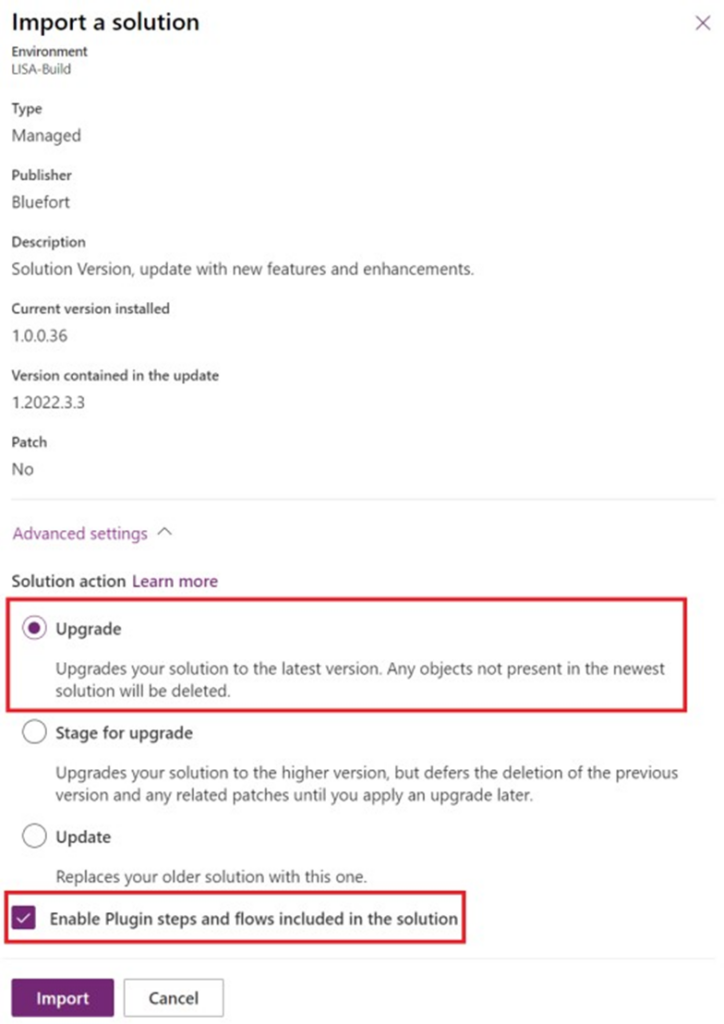
  1. Import the solutions onto your Microsoft Dynamics 365 Sales environment

Make sure to set the option to automatically enable plug-ins to true. When updating to a new version of a CRM solution, it is very important to Upgrade (i.e. the default behavior) not Update the solution. Updating the solution will not clear any old metadata from earlier versions which might lead to unexpected system behavior.


Solution Files

The Bluefort TAPP ERP application is made up of two solutions.

1. The CRM Managed Solution Zip File usually called “BluefortTAPP_X_X_X_X_managed.zip” where X denotes a version/sub-version number.

2. The CRM / Dual Write Mappings & Extensions Zip File usually called “BluefortTAPPERPdualwriteextensions_X_X_X_X_managed.zip” where X denotes a version/sub-version number.

Both need to be installed and configured for the application to work.

Configuration

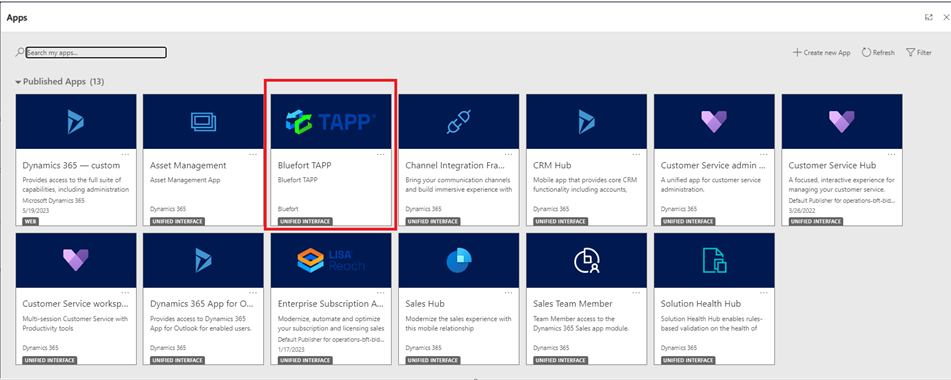
Upon successful deployment of the solution you should see a new model driven app called Bluefort TAPP in the main menu of Dynamics 365 as shown in the screenshot below.

Assignment of Dataverse (CRM) roles

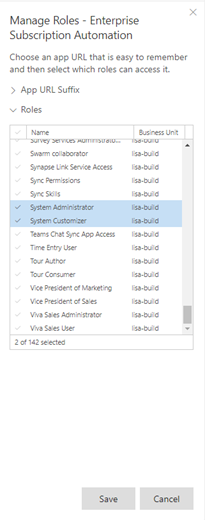
Once the model driven app is visible in the environment, the next step would be for a user with the System Administrator role to assign other roles to the application so that other non-admin users are able to access the application. This can be done by clicking on the ellipses (3 dots) right above the name of the model driven app (i.e. beneath the Bluefort TAPP logo) and then clicking on Manage Roles in the menu which pops up.

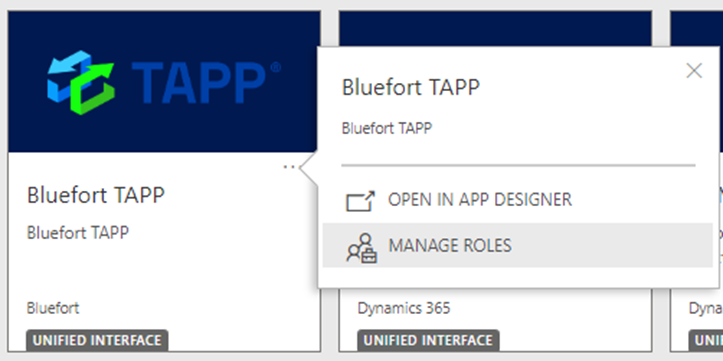
Once this is clicked, a new slider menu is displayed where one can assign which roles can access the Enterprise Subscription Automation model driven app. Both standard CRM roles and custom CRM roles which are specific to the organisation can also be assigned to the application.

Onboard your Dataverse (CRM) environment to GoCardless

If you deployed Bluefort TAPP ERP than the merchant onboarding happens from the Microsoft Dynamics 365 Finance and Operations / FinOps / FSCM side. For more detailed steps of how this is done please find the Merchant Onboarding section of this article.

If you deployed Bluefort TAPP (i.e. the stand-alone version without ERP integration) then follow the steps below.

The first step is to open the Bluefort TAPP model driven app by clicking on the Bluefort TAPP logo in the apps menu. Then click on TAPP onboardings and click on the New button to create a new onboarding record.

In the form’s General Tab:

  1. enter a Name for the onboarding record
    1. Set Onboarding Type to GoCardless Merchant
    1. Set Onboarding Sub-Type to Sandbox or Live (depending on what GoCardless API endpoint type you want to connect to)

Do not click Save yet but go to the GoCardless Tab and provide a value for:

  • Direct Debit Payment Time Fence – this is the default number of days a direct debit payment is charged after the invoice is created. This will be inherited to the account and contact entity when GoCardless is enabled for the said record however the user can choose to override this auto-inherited value on the account or contact record itself. The value will be used to calculated the direct debit date on the invoice report i.e. system date + number of days specified by the time fence field on the account or contact record the invoice is linked to.
  • GoCardless Redirect URL – this is the web page your customers will be re-directed to once they complete a billing request flow / mandate onboarding.
  • GoCardless Exit URL – this is the web page your customers will be re-directed to once if the billing request flow / mandate onboarding flow exists unexpectedly, expires etc.

You may now proceed to save the record.

Once the record is saved, back on the General Tab, the Onboarding URL is generated. The onboarding URL is used to onboard the CRM organisation (i.e. the legal entity using CRM) as a GoCardless merchant (sometimes also referred to as Creditor). Thus this URL should be sent over to the merchant admin if the CRM SysAdmin is not the Merchant Admin. In a production/live scenario, the merchant admin should be a legal representative of the legal entity who has the authority to sign up the legal entity as a GoCardless merchant.

Note: It is VERY IMPORTANT that the legal representative has an enabled user in the Dynamics 365 / Dataverse environment and is assigned a role that provides admin access to the app during onboarding. If the user no longer requires access to Dynamics 365 / Dataverse the role and user assignment can be revoked after the merchant onboarding process is complete.

Once the legal representative of the legal entity receives the Onboarding URL and clicks it, the GoCardless hosted page is presented. This wizard will guide the user through the merchant onboarding process for the legal entity. The first step in this wizard is to create an account with GoCardless or sign-in if the legal entity was already signed up to GoCardless in the past.

At the end of the wizard the user will be re-directed to a page on the bluefort website and here it is important to click on the button indicated in order to send the token and organisation information to the Dynamics 365 Sales / dataverse.

Clicking this button would redirect the user back to a page where the user should receive confirmation pop-up that the Merchant onboarding is successful. Please ensure that the page or browser session is only closed after this pop-up is displayed.

After the legal representative receives the success message the onboarding can be verified by ensuring that the Verification status has the value Successful. In a Sandbox environment the Verification status goes straight to Successful but in a live/production environment the initial status will typically be In Review until the merchant application status is reviewed by GoCardless. If the Verification status is set to Action Required then it means that GoCardless require further information before your legal entity can be successfully onboarded as a merchant.

For Bluefort TAPP ERP, the steps below are done from the Microsoft Dynamics 365 Finance and Operations / FinOps / FSCM user interface not from CRM.

Getting the latest Verification Status

The latest Verification Status can be obtained by clicking on the Test Merchant Connection button in the ribbon of the TAPP Onboarding form. The results are displayed in the GoCardless Merchant Connection section.

Once Merchant is correctly linked message is display and the Verification status field has the value Successful, this means that you have successfully completed deployment and configuration of Bluefort TAPP for Microsoft Dynamics 365 Sales and GoCardless!

GoCardless API Health Check

You can test connectivity to the GoCardless API by clicking the GoCardless API Health Check button on the ribbon of the TAPP Onboarding form. The results are displayed in the GoCardless Health Check section.

A successful health check results in the message: GoCardless API is up and running.

Click Here to see a demo of configuration and day-to-day use of Bluefort TAPP for Microsoft Dynamics 365 Sales.

Updated on April 30, 2024

Was this article helpful?

Related Articles

Leave a Comment