TAPP for GoCardless and Microsoft Dynamics 365 Sales – Deployment and Configuration
Introduction
This page explains how you can get TAPP for Microsoft Dynamics 365 Dataverse/CE deployed and configured in your Microsoft Dynamics 365 Dataverse/CE Environment. Contact Bluefort support on support@bluefort.io if you have any questions.
Which TAPP Product type for Microsoft Dynamics 365 Sales?
Bluefort has two different TAPP products for Microsoft Dynamics 365 Sales. One is called Bluefort TAPP and the other one is called Bluefort TAPP ERP.
Bluefort TAPP
Bluefort TAPP should be deployed when you are using Microsoft Dynamics 365 CE/CRM/Dataverse applications only without integration with Microsoft Dynamics 365 ERP. This solution works entirely within Microsoft Dynamics 365 Dataverse/CE .
Bluefort TAPP ERP
If your deployment consists of both Microsoft Dynamics 365 Dataverse/CE and Microsoft Dynamics 365 Finance and Operations / FinOps / FSCM applications then you should deploy Bluefort TAPP ERP. Bluefort TAPP ERP has all the necessary company and dual-write dependencies to communicate to Microsoft Dynamics 365 Finance and Operations / FinOps / FSCM applications using Microsoft’s dual-write technology. However, it provides limited functionalities on the CRM side when compared to Bluefort TAPP because it is assumed that the bulk of the financial operations will happen within the ERP system not the CRM side.
Pre-requisites for Bluefort TAPP (no ERP)
In order to successfully deploy this product you need to have a Microsoft Dataverse environment with a database and Microsoft Dynamics 365 Sales or Microsoft Dynamics 365 Customer Service app deployed.
Pre-requisites for Bluefort TAPP ERP
In order to successfully deploy this product you need to have a Microsoft Dataverse environment with a database and Microsoft Dynamics 365 Sales or Microsoft Dynamics 365 Customer Service app deployed.
Bluefort TAPP CRM ERP requires TAPP Finance March 2024 Wave 1 or later to be deployed on the D365 Finance/FSCM environment that will be linked to the Dataverse environment. Additionally, the solutions listed below must be installed before installing any of the Bluefort TAPP CRM ERP solutions.
1. Dual-write core solution
2. Dual-write Application Core Solutions
3. Dual-write Finance Solutions
4. Dynamics 365 HR Common Tables
5. Dual-write Human Resources solution
6. Dual-write Supply Chain solution
7. Dual-write Asset Management Solutions
The above are all free dual write solutions downloadable from Microsoft AppSource.
Obtaining the Software for Bluefort TAPP (no ERP)
The Software can be downloaded from Microsoft AppSource. These are the high-level steps:
- Browse to Microsoft AppSource.
- Make sure you are logged in to AppSource with a user from the same tenant where you would like to install TAPP for Microsoft Dynamics 365 Sales.
- Click on the Install Now button.
- Confirm your detail and click on the Install button.
- You are now automatically re-directed to Power Platform admin center.
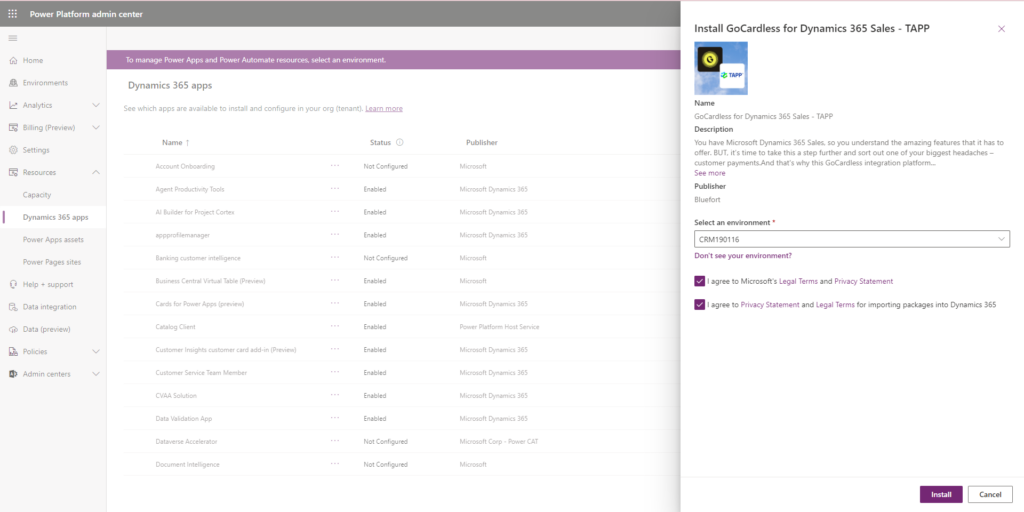
- Within Power Platform admin center, select the target environment where you want to install the software, agree to the legal terms and privacy statements and click on the Install button.
- The installation will start within Power Platform admin center.

Obtaining the Software for Bluefort TAPP ERP
Steps
- Open your command prompt

- Copy the Bluefort TAPP ERP package from GitHub executing the following command
curl -LOJ -u bluefortsupport: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
- Check if the download was successful

- Unzip the contents by executing the following command: tar -xf [FILEPATH]

- A folder should be made available containting all the releases for Bluefort TAPP ERP

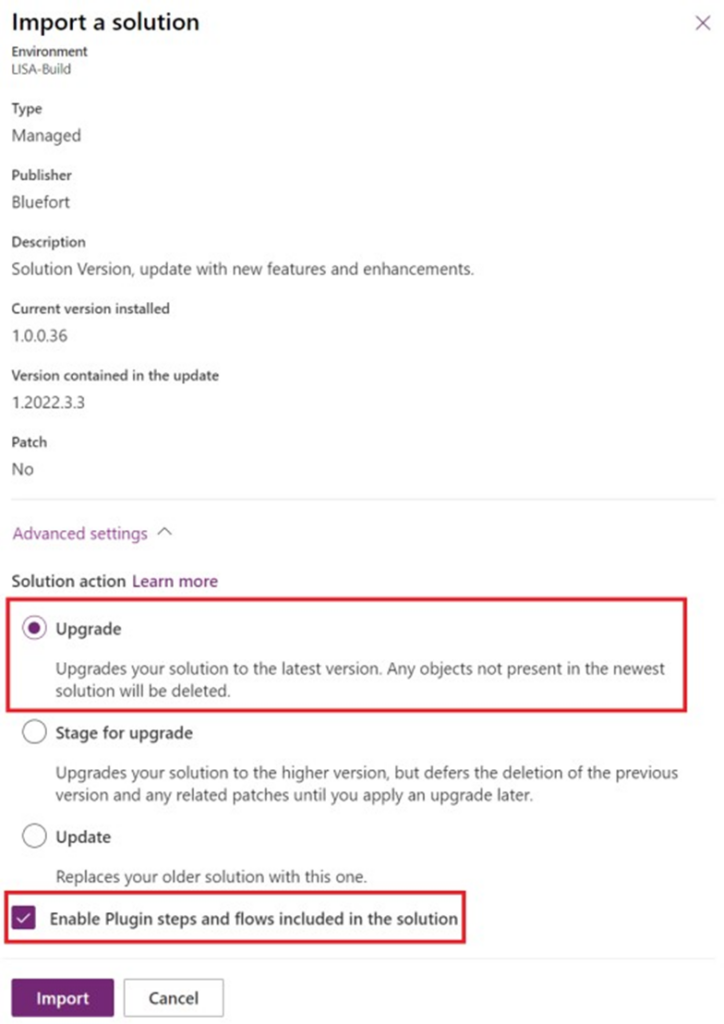
- Import the solutions onto your Microsoft Dynamics 365 Sales environment
Solution Files
The Bluefort TAPP ERP application is made up of two solutions.
1. The CRM Managed Solution Zip File usually called “BluefortTAPP_X_X_X_X_managed.zip” where X denotes a version/sub-version number.
2. The CRM / Dual Write Mappings & Extensions Zip File usually called “BluefortTAPPERPdualwriteextensions_X_X_X_X_managed.zip” where X denotes a version/sub-version number.
Both need to be installed and configured for the application to work.
Configuration
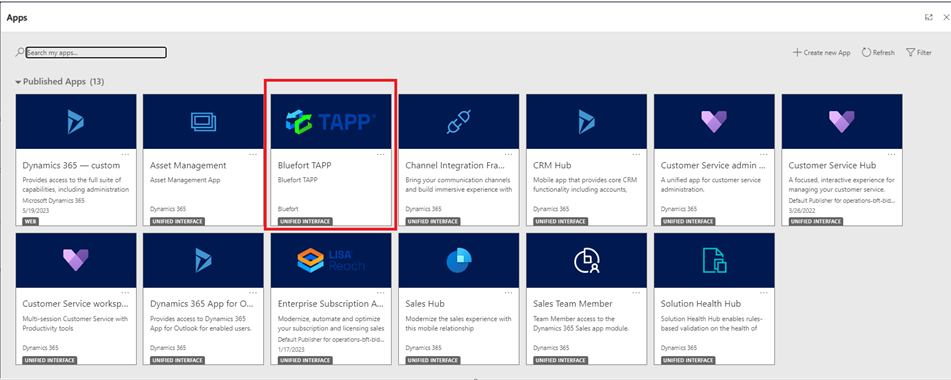
Upon successful deployment of the solution you should see a new model driven app called Bluefort TAPP in the main menu of Dynamics 365 as shown in the screenshot below.
Assignment of Dataverse (CRM) roles
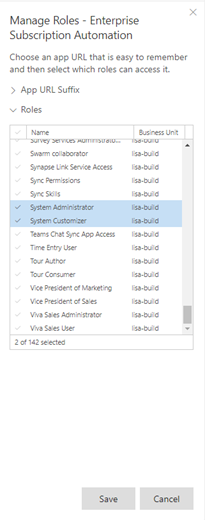
Once the model driven app is visible in the environment, the next step would be for a user with the System Administrator role to assign other roles to the application so that other non-admin users are able to access the application. This can be done by clicking on the ellipses (3 dots) right above the name of the model driven app (i.e. beneath the Bluefort TAPP logo) and then clicking on Manage Roles in the menu which pops up.
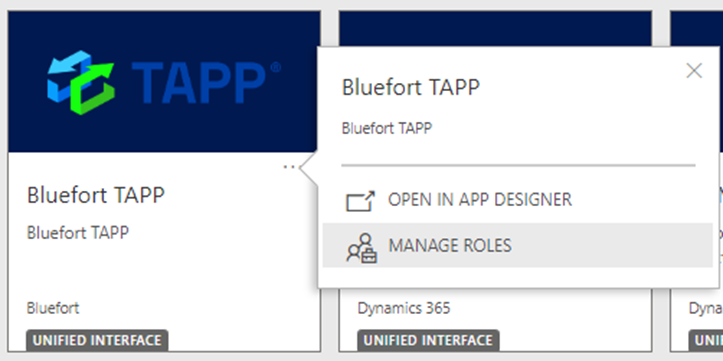
Once this is clicked, a new slider menu is displayed where one can assign which roles can access the Enterprise Subscription Automation model driven app. Both standard CRM roles and custom CRM roles which are specific to the organisation can also be assigned to the application.
Congratulations!
You have finished deploying Bluefort TAPP for GoCardless and Microsoft Dynamics 365 Sales. If you’ve encountered any issues, have questions or need help or support please reach out to the Bluefort support team on support@bluefort.io
The next step would be to link you Microsoft Dynamics 365 Sales / Dataverse environment to GoCardless by onboarding one or more GoCardless merchants.
