
Introduction
Before any analysis or design work begins this is the required step. This article explains the steps in the stage, the gate you have to satisfy, and how to give ARVO the input it needs to produce good work.
If you have not created a project yet, start with Create a project and read the Compass, which shows where the steps for this stage are at and how the progress line tells you what is next.
The steps
Intake has four steps and only the first is mandatory, but the three optional ones are worth the extra minutes, because everything that follows is shaped by what you attach here.
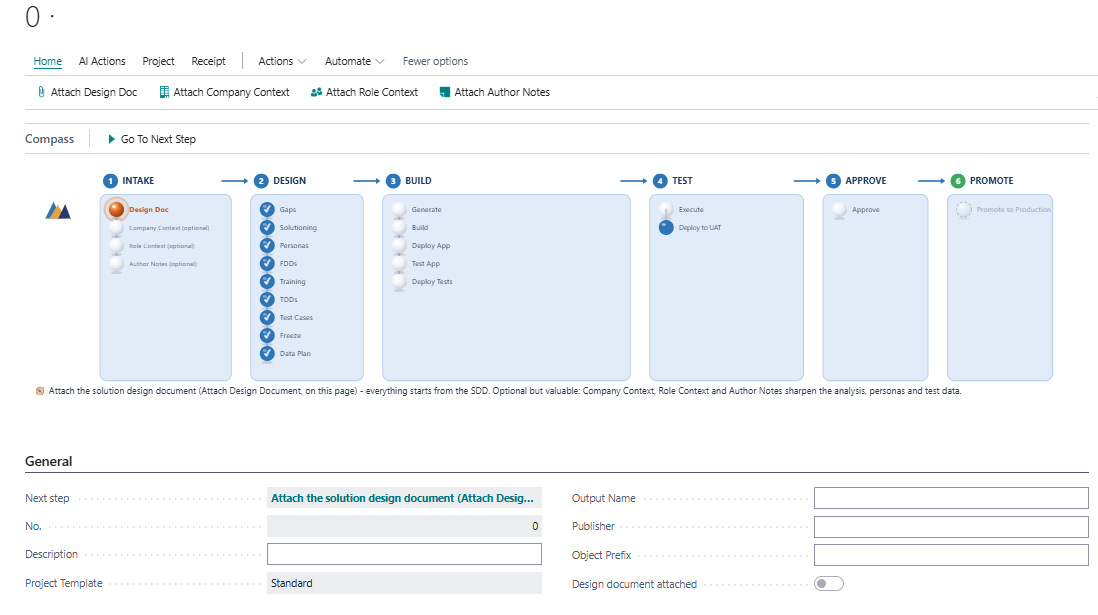
Alongside the attachments, complete the project fields: description, output name, publisher and object prefix. The output name and publisher become part of the generated application’s identity, so choose them deliberately and keep them consistent.
What produces a good design document
The design document is the single input that shapes the analysis, the designs, the tests and the finished solution that follow, so time spent improving it reaps the benefits. The most useful thing you can do is separate what the customer needs from how you imagine it being built, and then say how you would know that each need had been met. A document written that way is easy to design with, rather than a document written as a list of screens and fields.
Write requirements as concrete statements, showing one need per statement, each describing an outcome in business terms. A requirement that combines three ideas is hard to design with and harder to create tests for, because it can be half satisfied and nobody can agree whether it passed. It is also important to keep the language straightforward and plain. Then name the process, the document, the role and the process in a normal business day that the change affects, and say what the user should be able to do afterwards, specifically what they cannot do today.
Acceptance criteria deserve particular attention, because they carry more weight here than in any other conventional project. Test cases are created from the approved designs and the acceptance criteria before any code is generated, so criteria that are specific become tests that genuinely prove the requirement. Criteria written as opinions must be avoided here. Think of these examples:
“The posting routine should be efficient” – this cannot be proved or tested against.
“Posting a sales order with three lines creates one posted invoice and three transactional journal entries” – this can definitely be proved or tested.
A useful acceptance criterion usually states four things.
• The starting condition, including any data that must already exist.
• The action taken, and the role of the person taking it.
• The result that should be observable afterwards, on the screen, in the record or in the resulting entries.
• What should happen when the conditions are not met, where that behaviour matters to the business.
Check each requirement against standard Business Central and the apps already installed before you commit it to the document. If a requirement duplicates something the customer already owns, ARVO recommends procuring the existing capability rather than rebuilding it, and if you choose to proceed anyway you must record a reason that becomes part of the audit trail. Resolving that duplication at intake is considerably cheaper than mitigating it at approval.
Watch the size of the document as well. A design document that covers several unrelated areas of the business produces a large number of gaps, and an unusually high gap count is a signal that the scope is too broad and would be better split into more than one project. Smaller, coherent projects move through the lifecycle more predictably, and they give an approver something they can realistically read and understand.
Finally, use the optional attachments, namely the company context helps the analysis reflect the customer’s real situation instead of a generic one. Role context is used to establish the personas that appear later in testing. Author notes carry the constraints the author of the document would otherwise have to repeat in every conversation. Better requirements and better context produce better designs, better tests and better output, and that is the whole argument for spending time at this stage.
That context carries well beyond the analysis. Company, industry and role context sharpen the design, the persona tests and the user-acceptance assignments later in the project, which is the practical reason for attaching all four documents rather than the design document alone.
Scope and the target environment
Scope and the target environment are fixed at intake as well. The areas that are excluded, the object ranges ARVO Studio is allowed to use and the dependencies the solution relies on are recorded on the project before anything is generated, so the boundaries of the work are settled while they are still easy to agree.
Intake is also what the decisions on each gap are eventually taken from. Once the design document has been analysed, every gap carries a decision: build it, defer it, reject it, do it manually or use existing IP. The clearer the requirements and the context you supply here, the easier those decisions are to take and the easier they are to defend later.
The gate and approvals
The gate for this stage, Intake, is Scope Confirmed. It is satisfied when the solution design document is attached and the required project fields are complete. Until it is satisfied the project stays at Intake, and the guidance line beneath the Compass keeps pointing you at whatever is still missing.
Intake is approved by the person creating the project, normally the solution architect or functional consultant who owns the engagement. There is no separate sign-off at this stage; the formal human approval in the lifecycle comes later, at Approve. What you are confirming here is scope: that this document, with this context, describes the work the project is meant to deliver.
What is added to the project record
The attached design document and any context you supplied are held against the project and remain available for the rest of its life. The source filename appears on the project card, alongside the design document indicator and the company context and role context indicators, so anyone opening the project later can see what it was based on. The attachment is recorded as a material event in the receipt, with the user and the time, and that is the first entry in the evidence the customer eventually keeps.