How to deploy LISA Reach Sales in Microsoft Dynamics 365 Project Operations
1. Pre-requisites
- In order to install LISA Reach Operations the following pre-requisites are required:
- Microsoft Dynamics 365 Project Operations
- Microsoft Dual-Write Solutions for Microsoft Dynamics 365 Project Operations. Learn more from the standard Microsoft documentation here
2. Download the Managed Solution
a. Mandatory Steps
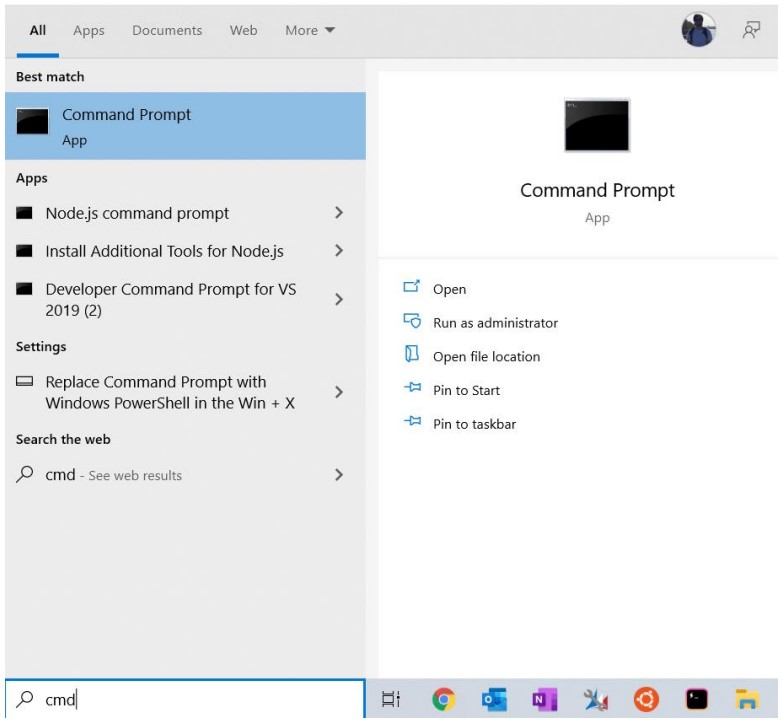
1. Open your command prompt
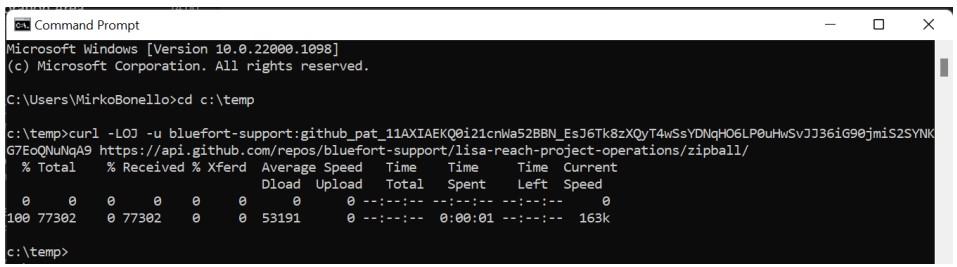
2. Copy the LISA Reach Operations package from GitHub executing the following command
New Command:

curl -LOJ -u bluefortsupport: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 https://api.github.com/repos/bluefort-support/lisa-reach-project-operations/zipball/

Deprecated Command:

curl -LOJ -u bluefortsupport:github_pat_11AXIAEKQ0i21cnWa52BBN_EsJ6Tk8zXQyT4wSsYDNqHO6LP0uHwSvJJ36iG90jmiS2SYNKG7
EoQNuNqA9 https://api.github.com/repos/bluefort-support/lisa-reach-projectoperations/zipball/
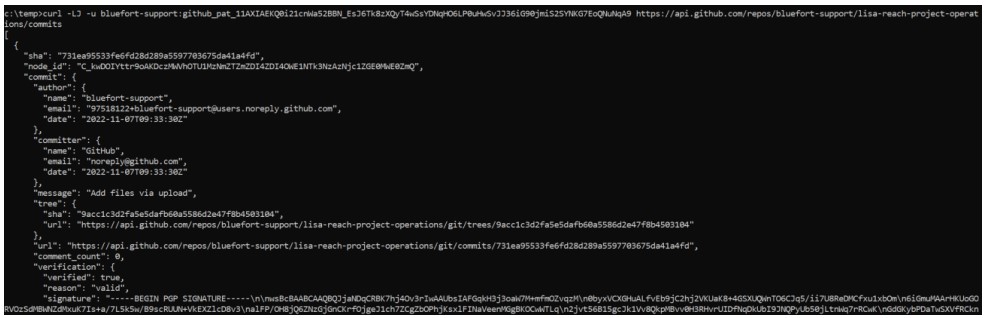
3. Check if the download was successful
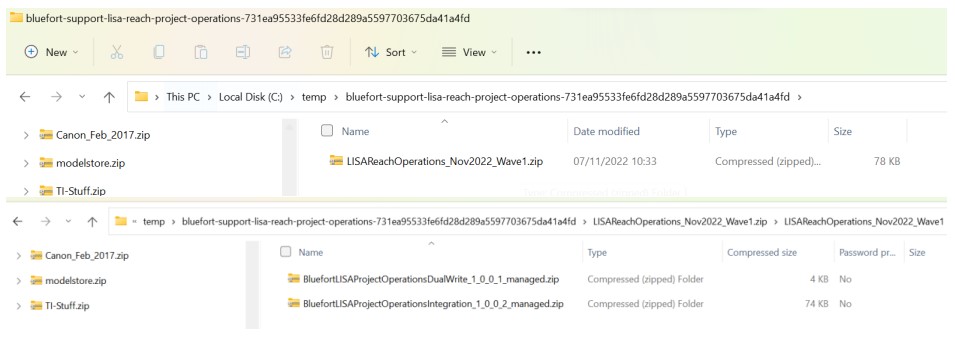
4. Unzip the contents executing the following command
tar -xf [FILEPATH]

5. You should see all packages and their respective solutions in the unzipped folder
b. Optional Steps
If you need to download an older version execute the following steps
1. List previous versions by executing the following command, and then copy the property
New Command:

curl -LJ -u bluefortsupport: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 https://api.github.com/repos/bluefort-support/lisa-reach-project-operations/commits

Deprecated Command:

curl -LJ -u bluefortsupport:github_pat_11AXIAEKQ0i21cnWa52BBN_EsJ6Tk8zXQyT4wSsYDNqHO6LP0uHwSvJJ36iG90jmiS2SYNKG7
EoQNuNqA9 https://api.github.com/repos/bluefort-support/lisa-reach-projectoperations/commits
2. Then execute the download command replacing [sha] with the sha you copied from the last step
New Command:

curl -LOJ -u bluefortsupport: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 https://api.github.com/repos/bluefort-support/lisa-reach-project-operations/zipball/[sha]

Deprecated Command:

curl -LOJ -u bluefortsupport:github_pat_11AXIAEKQ0i21cnWa52BBN_EsJ6Tk8zXQyT4wSsYDNqHO6LP0uHwSvJJ36iG90jmiS2SY
NKG7EoQNuNqA9 https://api.github.com/repos/bluefort-support/lisa-reach-projectoperations/zipball/[sha]

3. Import Core Managed Solution
You have now downloaded a managed solution titled “Bluefort LISA Project Operations Integration X.X.X.X” which needs to be imported on your Dynamics 365 Project Operations environment.
There are two methods for importing the managed solution:
1) From the Dynamics 365 CRM advanced settings module as described in this Microsoft document: https://docs.microsoft.com/enca/dynamics365/marketing/transfer-solution#example-procedure-part-3-import-asolution; or
2) From the Solutions tab of the Power Apps portal. More details can be found here: https://docs.microsoft.com/en-us/powerapps/maker/common-data-service/importupdate-export-solutions.
4. Update Site Map
You will need to manually add the FinOps parameter entity included in your managed solution. It is used for the Project Operations integration with Dynamics 365 Finance and Operations and should ideally be included in the Settings area as shown in the image below.
You can follow the Microsoft official guide provided in this link https://docs.microsoft.com/enus/powerapps/maker/model-driven-apps/create-site-map-app on how to add this new entity as a sub area to the settings area in your navigation site map.
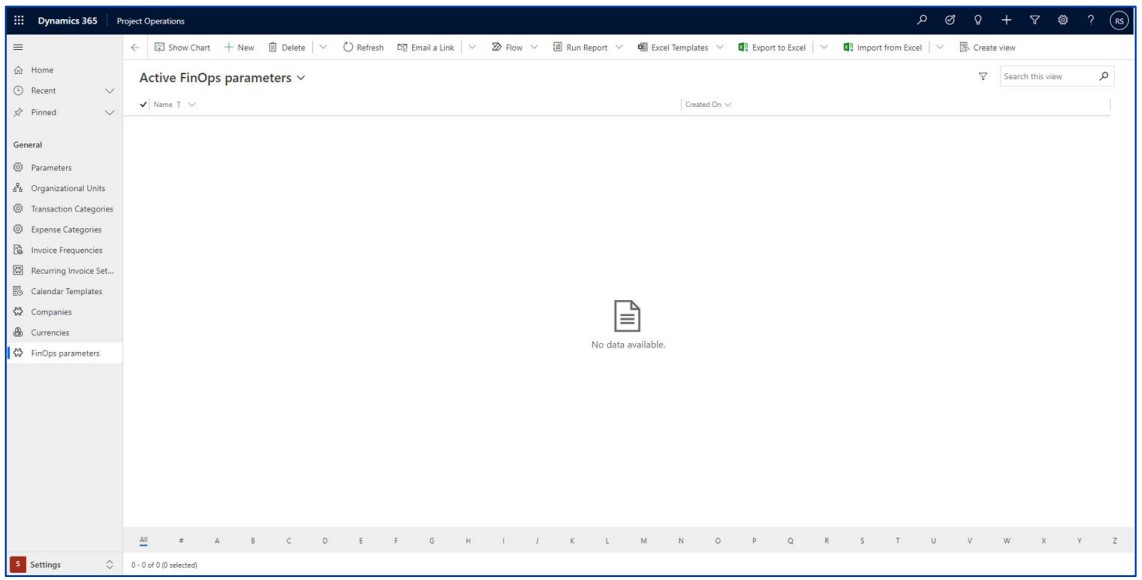
Publish the updated site map. You will see the FinOps parameters entity in Settings > General.
Figure 1: Edit Dynamics 365 Project Operations Site map
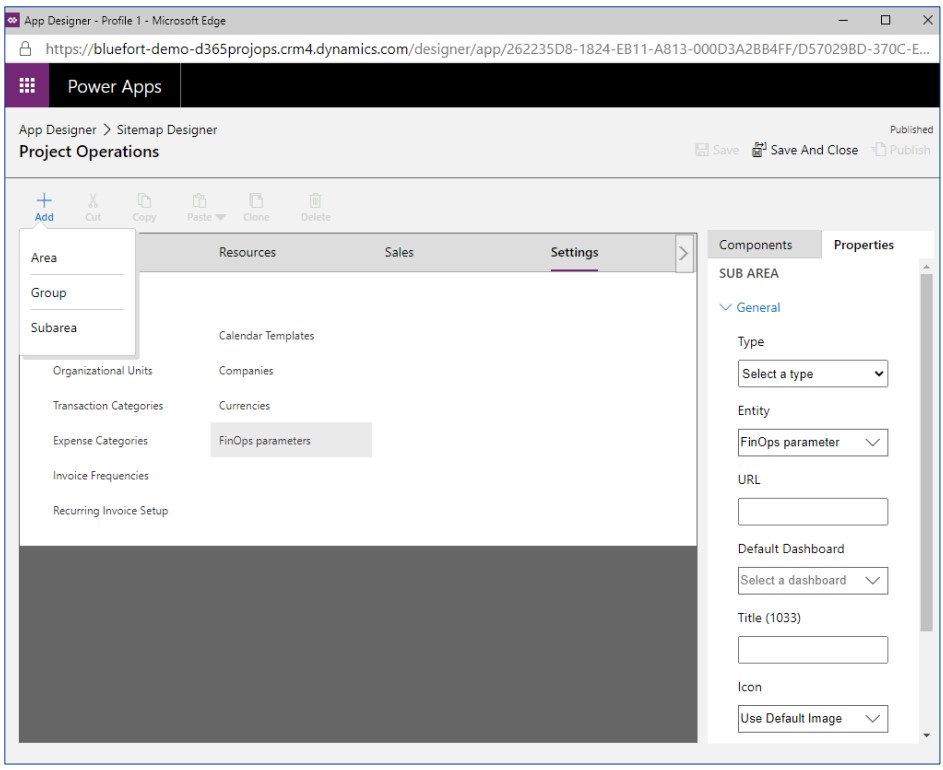
Figure 2: Published and updated Dynamics 365 Project Operations Site map
5. Add Bluefort Custom Script to OnSave Event of Project Form
You will need to manually add a bluefort custom script to the OnSave event of the Project form. The script is included in the Bluefort LISA Project Operations Integration managed solution imported in step 2. The library is called bft_UpdateLookup and the function is called PopulateFinOpsParam. It is important to tick the properties called “Enabled” and “Pass execution context as first parameter”.
The full details can be found in the screenshot below.
Figure 3: onSave event configuration on Project form adding bluefort custom script

6. Add New Bluefort Fields to Project Form
The Bluefort LISA Project Operations Integration managed solution will include two new fields on the Project entity which need to be added to the Project form (i.e. same form of step 4). Remember to add these fields to the form that users will be interacting with, assigning appropriate security roles to the respective form:
- bft_finopsparamid – FinOps Parameter (lookup)
- bft_finsopsURL – FinOps URL (calculated field)
Figure 4: Add new fields to Dynamics 365 Project Operations, Project Form.
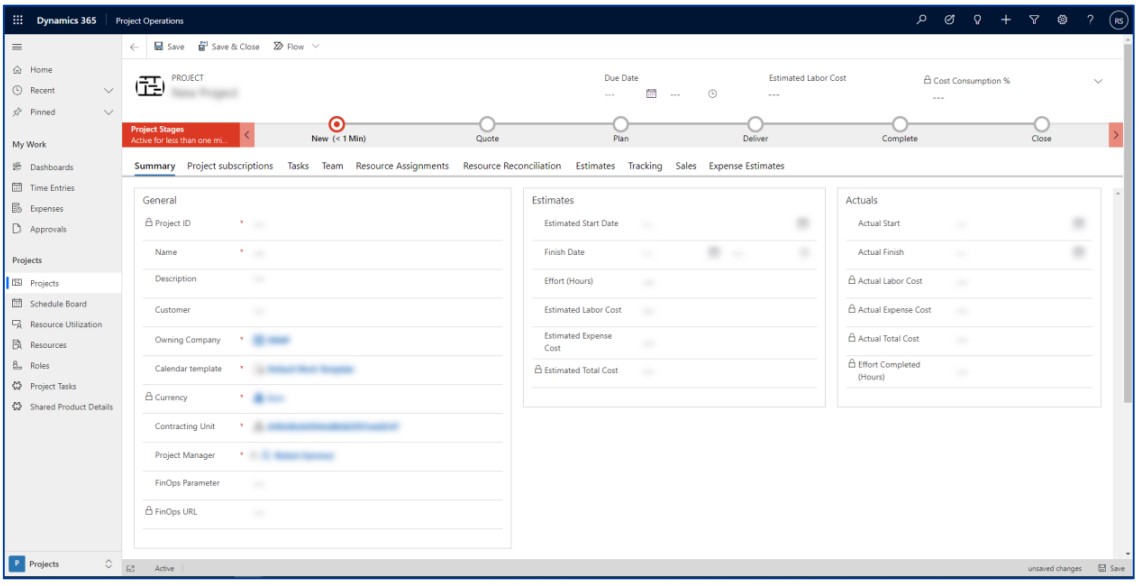
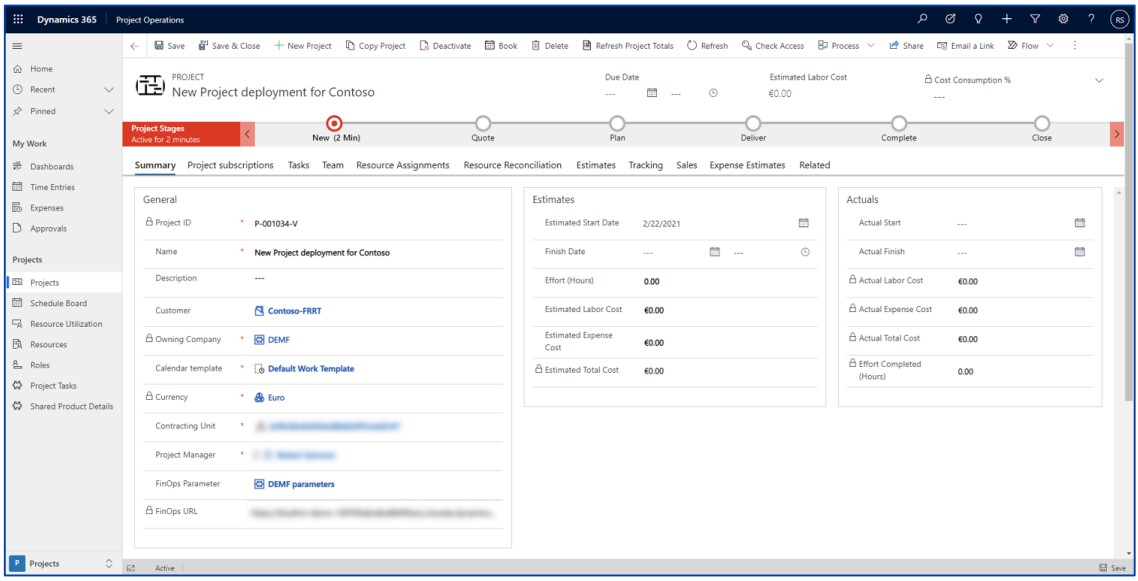
If step 4 above was done correctly and the record defined in step 6 below is created, then a new project record is created, the FinOps parameters will populate according to the Owning Company associated with the selected Customer.
Figure 5: Project creation and associated FinOps parameters.
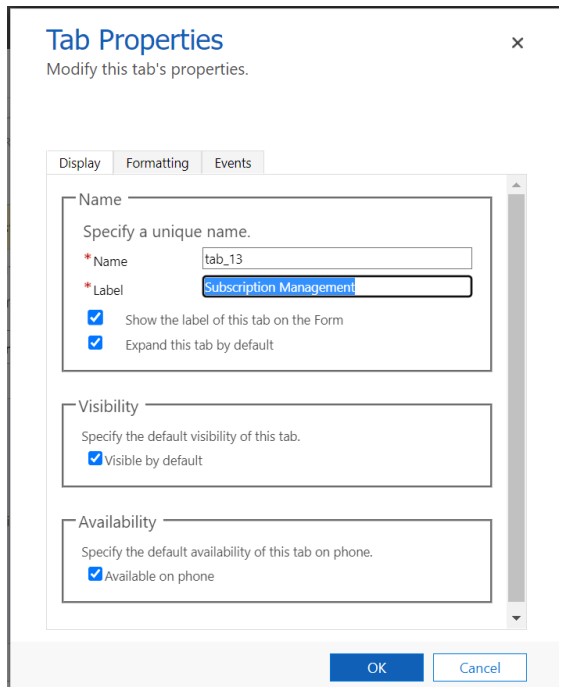
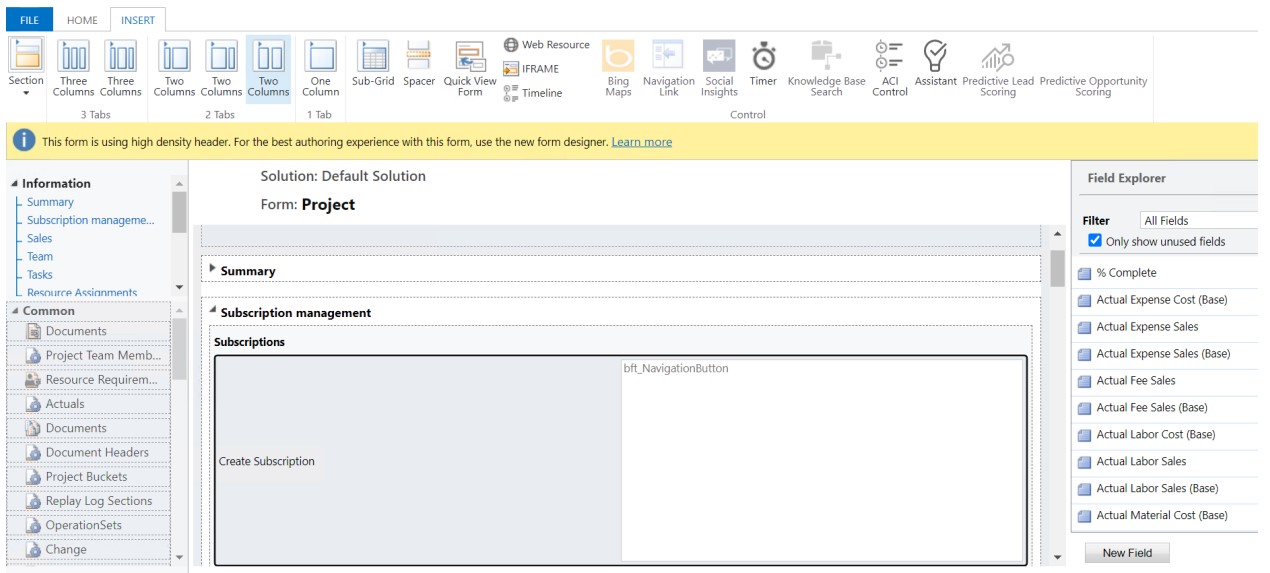
7. Add New Subscription Management tab to Project Form
Insert 1 column tab, and set the label to “Subscription Management”
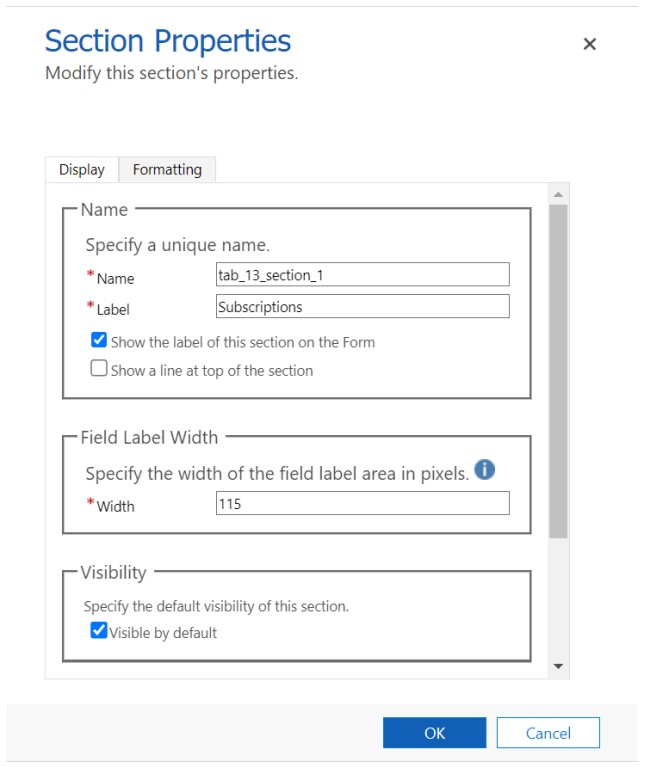
Then update the section properties
Then within the section, insert new web resource
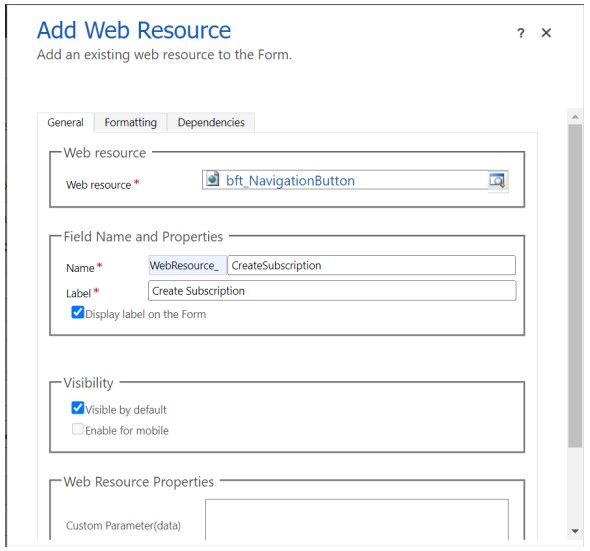
The customization will look like below once you finish
8. Create New Legal Entity Parameter Record
Initially, the FinOps parameters entity will be blank. An entry is required for each legal entity in Dynamics 365 Finance and Operations to which Dynamics 365 Project Operations will be integrating with.
In Settings > FinOps parameters, click on New on the Action bar.
Complete the following fields:
- Name – a logical name for the legal entity you are integrating with
- FinOps link – enter the URL of your Dynamics 365 Finance and Operations instance, ending with the relevant legal entity/company e.g. {dynamics.com/?cmp=DEMF}
- Select the corresponding legal entity/company from the lookup e.g., DEMF (the company entity is populated once dual-write is enabled between Dynamics 365 Project Operations and Dynamics 365 Finance and Operations)
Save and Close the record.
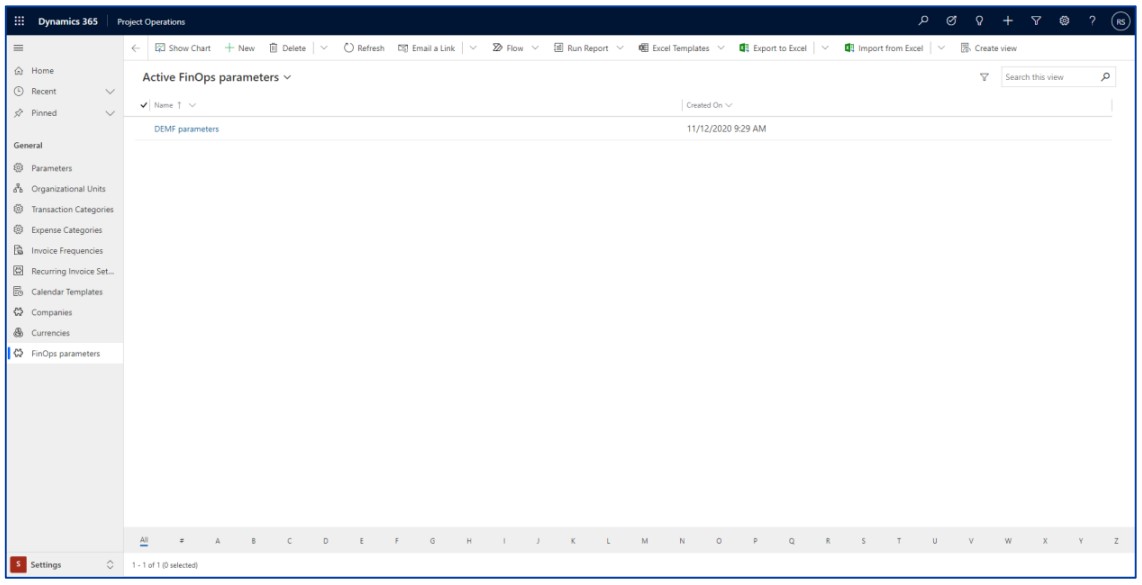
Create FinOps parameters entries for every legal entity/company where Project information and data can integrate.
Figure 6: Create FinOps parameters entry.
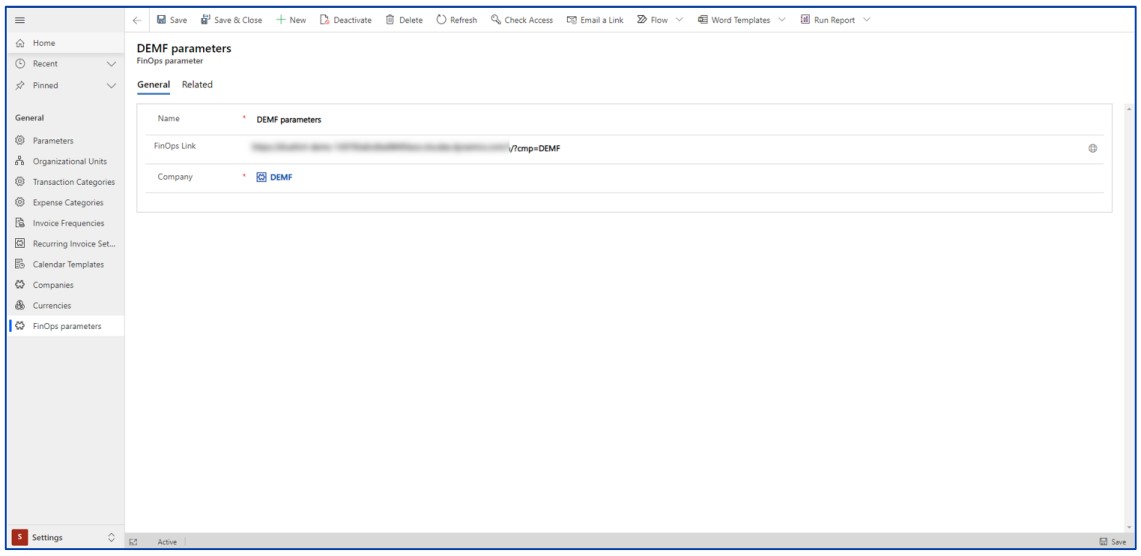
Figure 7: FinOps parameters entries in Dynamics 365 Project Operations.
9. Import Dual-Write Managed Solution
Bluefort LISA Project Operations Dual Write X.X.X.X
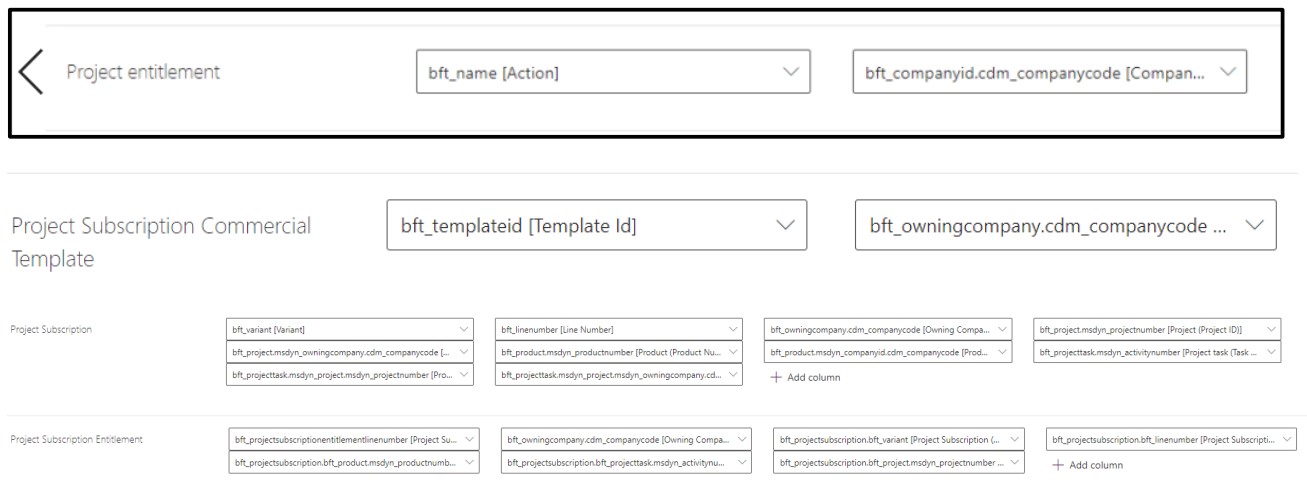
One Dual Write table map: bft_projectentitlements

Post Deployment Action
It is important to verify that the integration keys below exist and exactly as specified in the screenshots below. If not, they need to be manually created or manually changed to be the same as in the screenshots before enabling the respective dual-write map.