For changes made in Dataverse to sync to Business Central, the relevant entities must be enabled for Webhooks, allowing the integration with Business Central to be triggered instantly.
This page provides step-by-step guidance for enabling entities for Webhooks in bluefort’s BC – Dataverse Integrator.
Types of Webhooks
The Dataverse Integrator enables entities to be switched on for 3 different Webhook types;
- Create Webhook – handles the synchronization of records when they are created in Dataverse
- Update Webhook – handles the synchronization of records when they are updated in Dataverse
- Delete Webhook – handles the synchronization of records when they are deleted in Dataverse
Each Dataverse entity can be enabled for one or more Webhook types and can also be enabled to trigger for all fields or a selected set of fields.
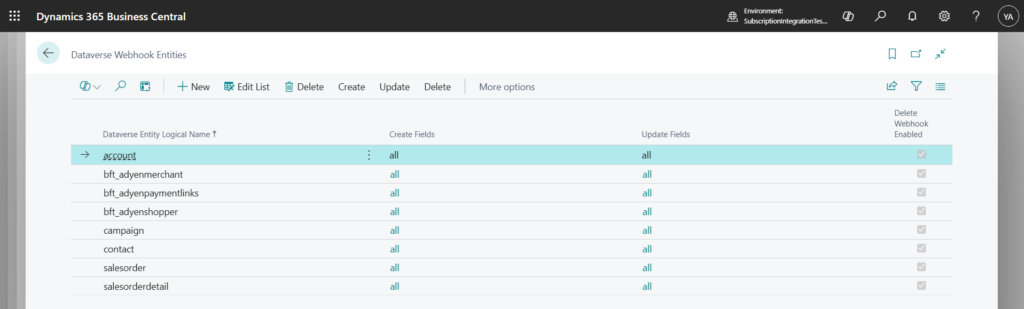
See which entities are enabled for Webhooks
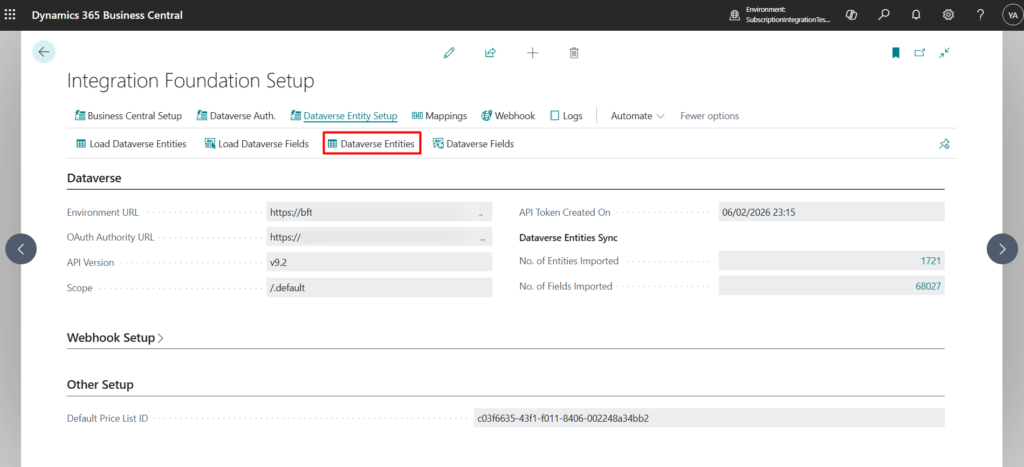
- Navigate to the Integration Foundation Setup
- From under the Dataverse Entity Setup menu, open the list of Dataverse Entities
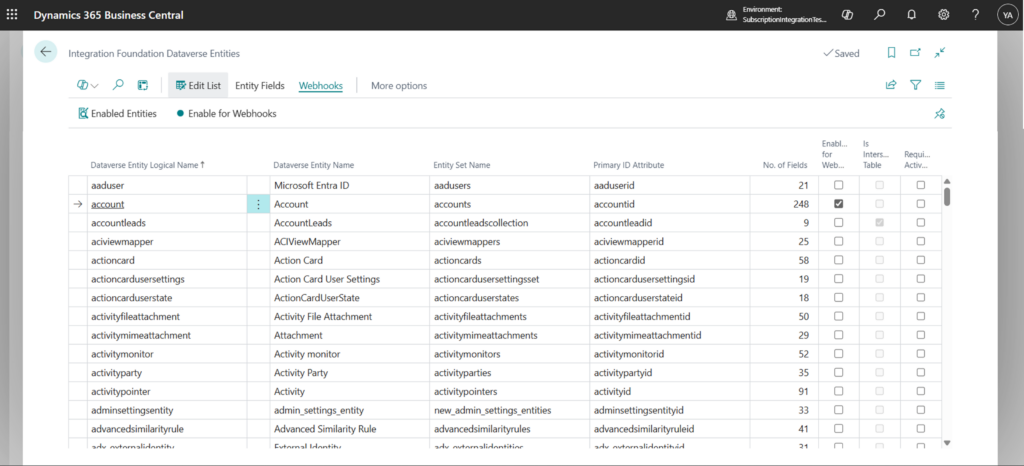
- Click on Enabled Entities from under the Webhooks menu tab.
Enable an Entity for Webhooks
- Navigate to the Integration Foundation Setup
- From under the Dataverse Entity Setup menu, open the list of Dataverse Entities
- Select the entity to be enabled for webhooks and click on Enable for Webhooks from under the Webhooks menu tab.
- If successfully enabled, the field Enabled for Webhooks is automatically ticked.
Change which Entity fields should trigger a Webhook
To determine which entity fields should trigger a webhook, users can select all or a subset of fields for each entity individually.
- Navigate to the Integration Foundation Setup
- From under the Dataverse Entity Setup menu, open the list of Dataverse Entities
- Click on Enabled Entities from under the Webhooks menu tab.
- Select the entity for which fields are to be changed
- Depending on the webhook type:
- To change which fields should trigger a Create webhook, click on Create – Select Fields
- To change which fields should trigger an Update webhook, click on Update – Select Fields


- Select one or multiple Fields that should trigger the webhook
- Depending on the webhook type being modified, click on Create – Enable / Disable for Webhooks or Update – Enable/Disable for Webhooks under the Webhooks menu.
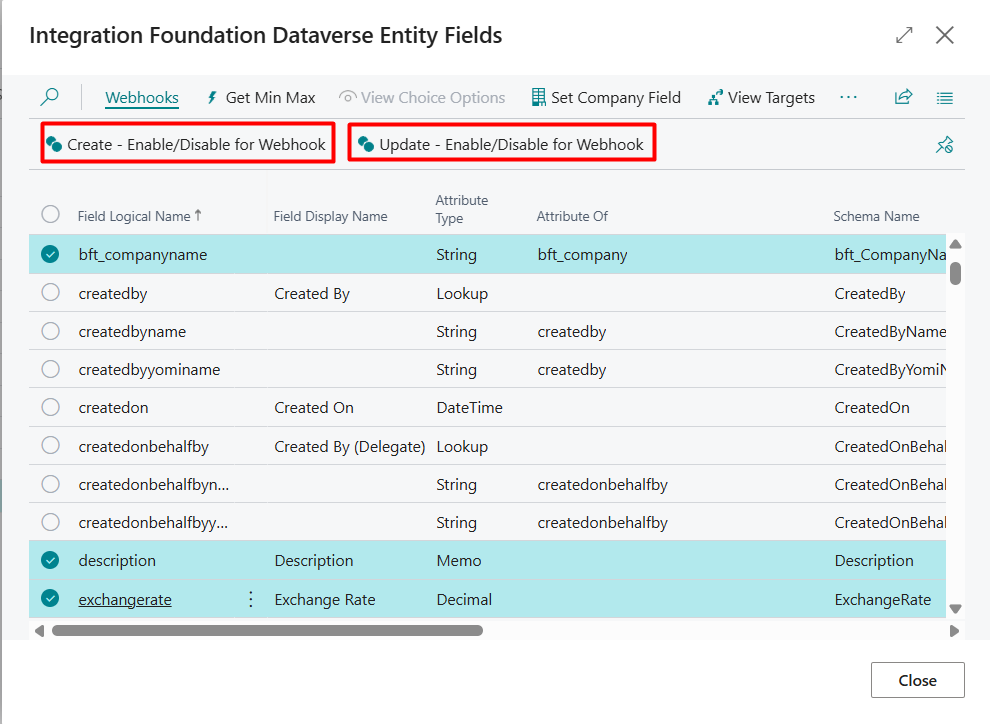
The Webhook Enabled Entity is updated accordingly;

When all fields are required to trigger a webhook, use the Create – Enable All Fields and Update – Enable All Fields menu actions in the Dataverse Webhook Entities page.


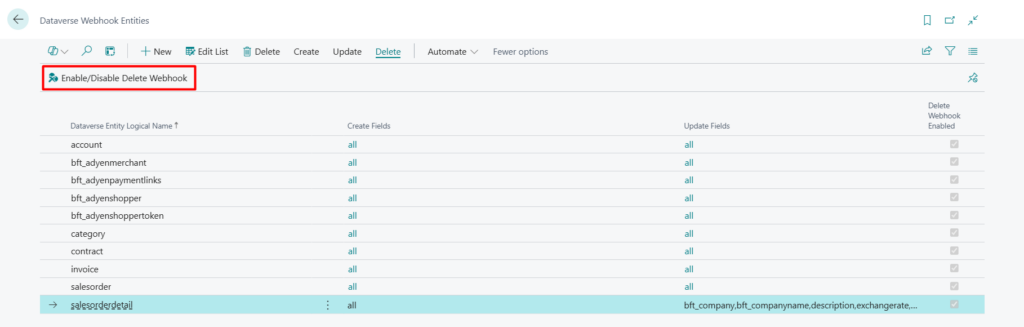
Enable/Disable the Delete Webhook for an Entity
The Delete Webhook is not field-based and therefore can only be enabled or disabled.
- Navigate to the Integration Foundation Setup
- From under the Dataverse Entity Setup menu, open the list of Dataverse Entities
- Click on Enabled Entities from under the Webhooks menu tab.
- Select the entity for which to enable/disable webhooks
- Click on Enable/Disable Delete Webhook