
Table mappings can be configured to run on a scheduled synchronization rather than instant sync. Scheduled sync is particularly useful for entities where records are created in high volumes and do not need to be immediately available in Dataverse. This approach helps optimize system performance while maintaining controlled and predictable data exchange.
This article explains how to configure and set up Scheduled Synchronization
Set up Scheduled Synchronization
- Navigate to the Integration Foundation Setup page
- Under the Mappings menu tab, click on Table Mappings
- Locate the Table Mapping and enable the Scheduled Sync field
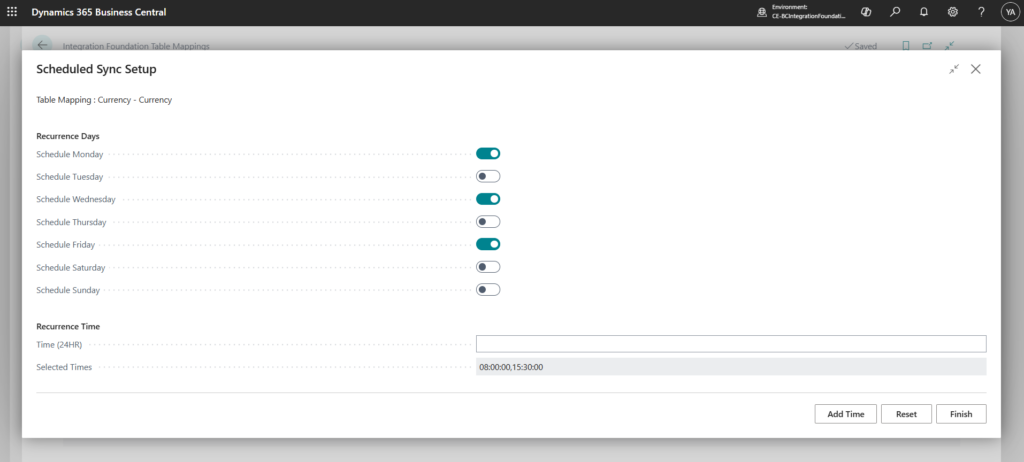
- Click on Scheduled Sync Setup under the Scheduled Sync menu tab
- Select the weekdays when the sync should run
- Insert the time (in 24-HR format) when the sync should run and click on Add Time.
- Repeat step 10 for every time in which the sync should run
- When done click Finish
Example; in the below setup, the scheduled sync is set up to run every Monday, Wednesday and Friday at 08.00 and 15.00.
See Scheduled Sync Runs
- Navigate to the Integration Foundation Setup page
- Under the Mappings menu tab, click on Table Mappings
- Locate the Table Mapping for which to see historical scheduled sync runs
- Click on View Scheduled Sync/s under the Scheduled Sync menu tab
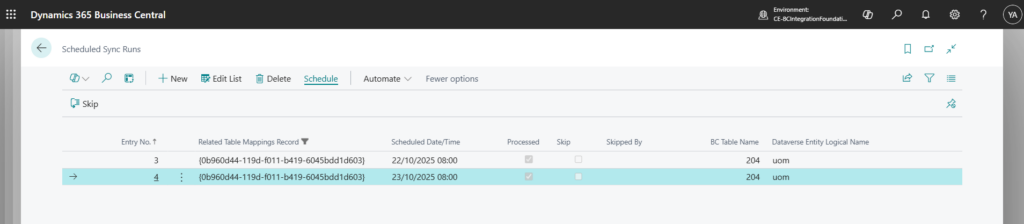
Skip a Scheduled Sync
Should a scheduled sync be skipped, this can be done via user intervention by following the below steps;
- Navigate to the Integration Foundation Setup page
- Under the Mappings menu tab, click on Table Mappings
- Locate the Table Mapping for which to see the scheduled sync runs
- Click on View Scheduled Sync/s under the Scheduled Sync menu tab
- Locate the sync run to skip
- Click on Skip under the Schedule menu tab
