
GoCardless for Dynamics 365 Business Central – TAPP leverages GoCardless’ direct debit system to enable the setting up of Direct Debit Mandates and issuing of payment requests using Direct Debit.
This article will guide you through;
- the process of initiating payment requests via Direct Debit and setting up of Direct Debit Mandates in both Sandbox and Production.
- the process of simulating Direct Debit Mandate setup and Direct Debit Payments in Sandbox
GoCardless for Dynamics 365 Business Central – TAPP leverages GoCardless’ Instant First Payment + Direct Debit mandate creation process.
Process Overview
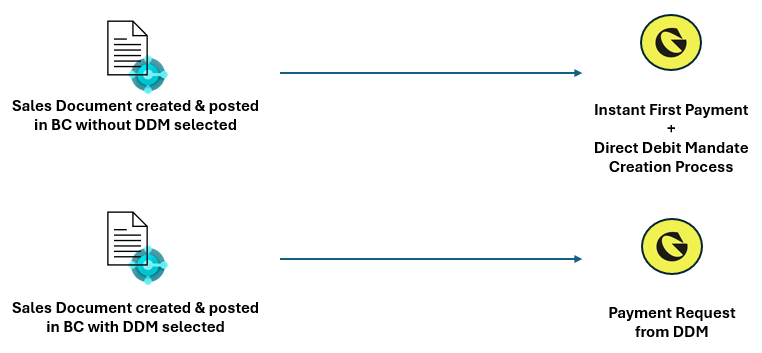
Creating an Instant First Payment + Direct Debit Mandate Creation
When issuing a Sales Document in Business Central that is enabled for DDM processing, and no Direct Debit Mandate is selected, a URL is generated to be sent to the customer to pay the first payment and set up a DDM.
- Create a Sales Invoice as per standard Business Central
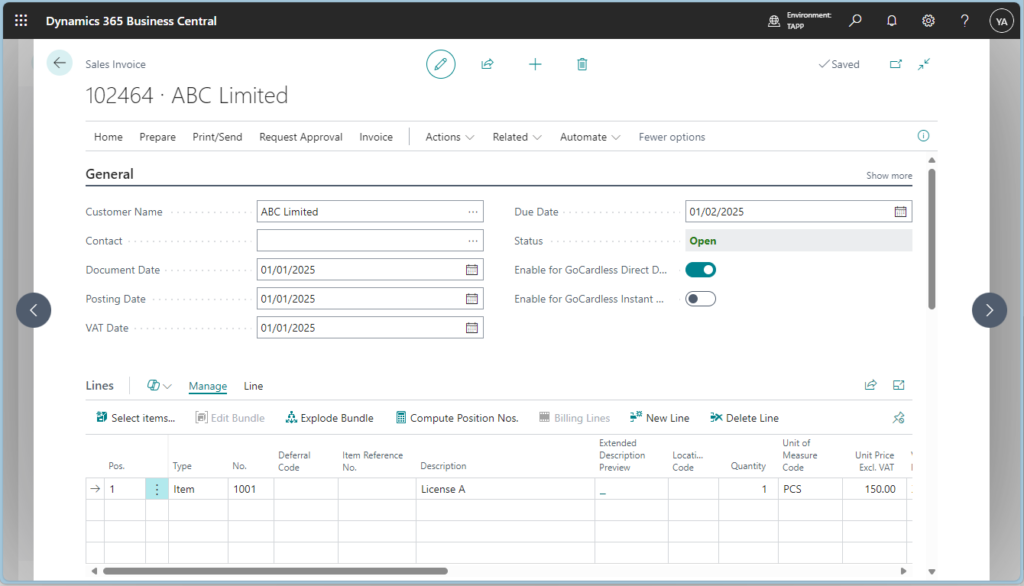
- Switch on Enable for GoCardless Direct Debit Mandate. The field Direct Debit Mandate ID in the invoice is blank.
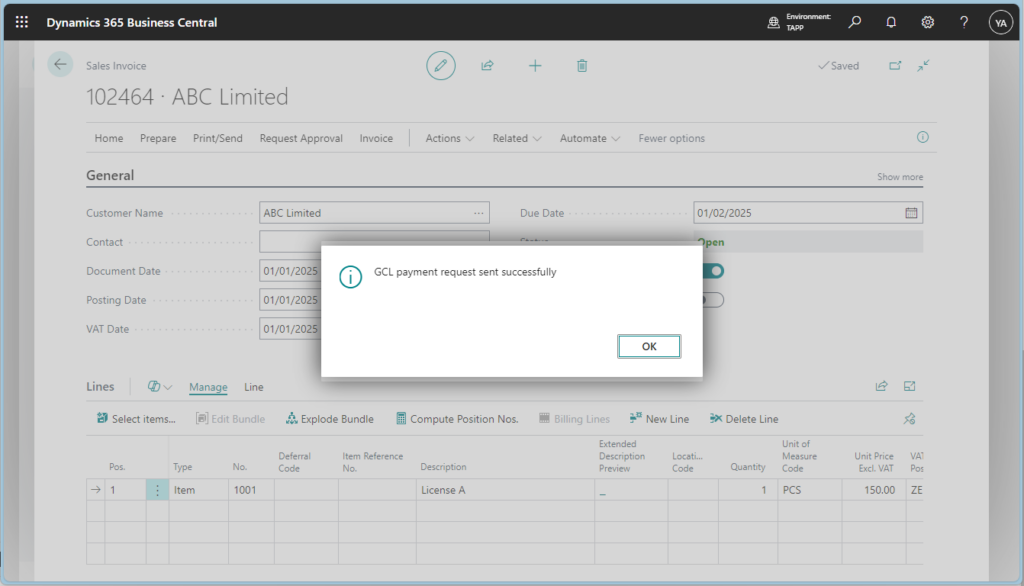
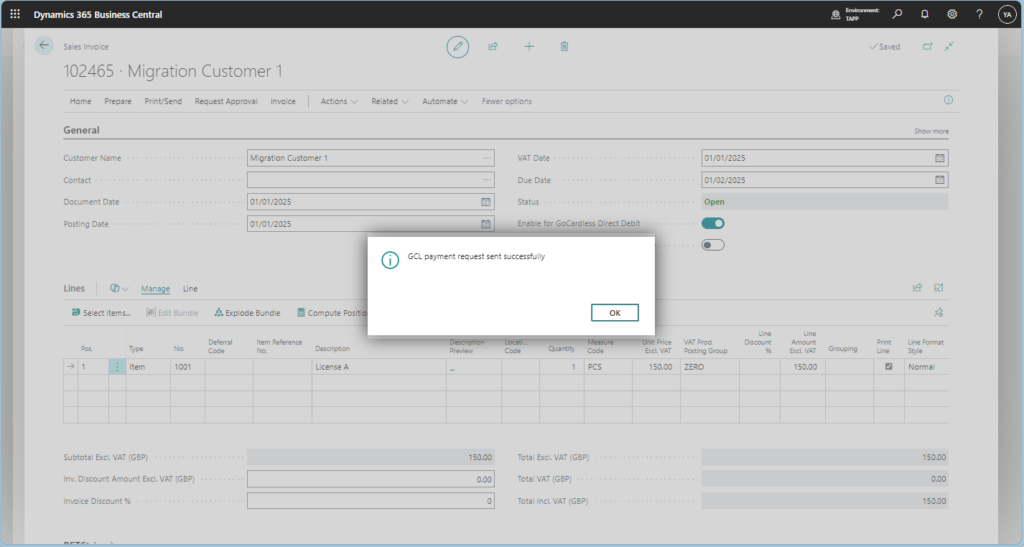
- Post the Sales Invoice as per standard Business Central. If posting is successful and the payment request has been successfully created, a confirmation message is returned.
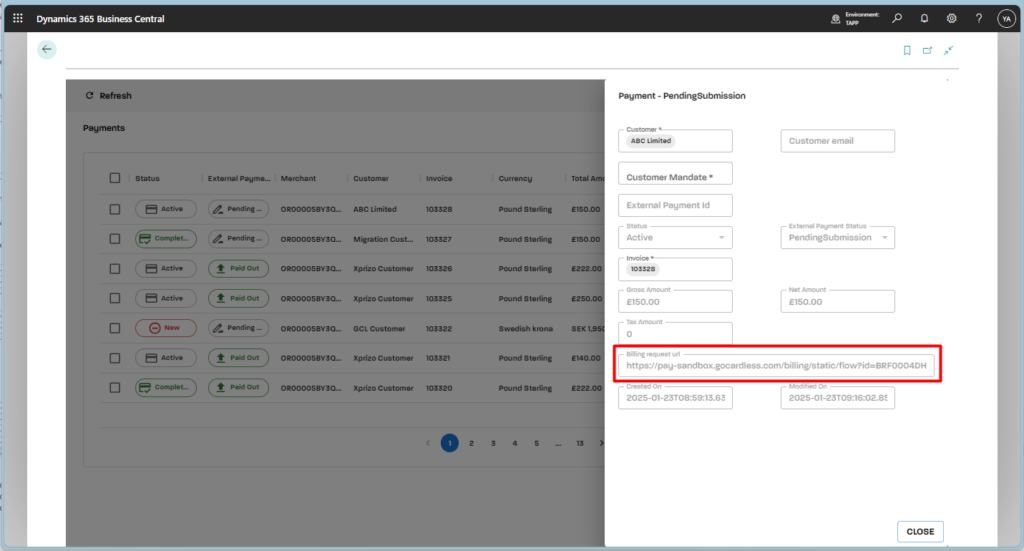
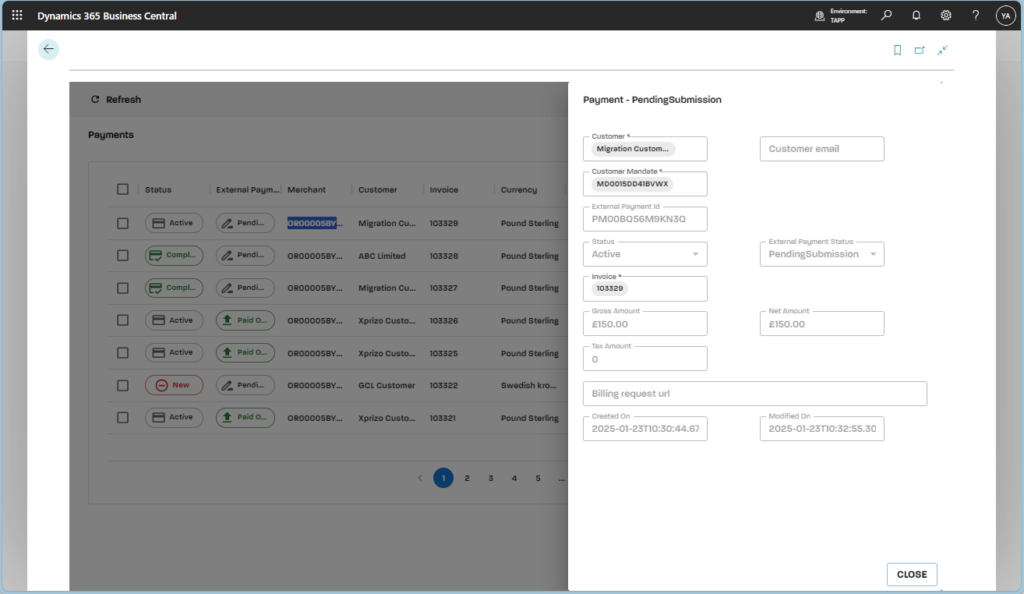
- Navigate to the GoCardless Payments screen to see the payment record that was created and click on Post Payment Action.
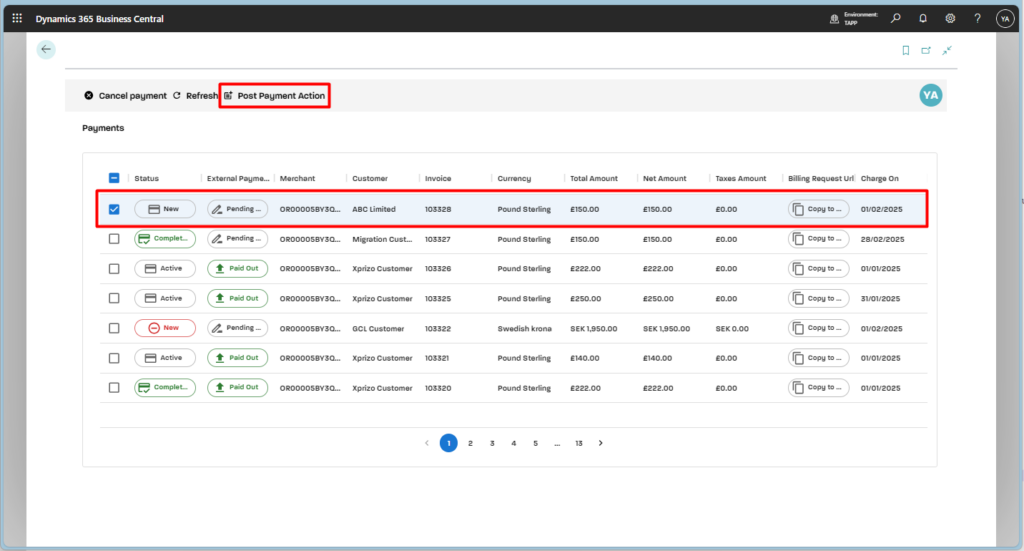
- Open the payment record (double-click on the payment) to view the payment information and get the Billing Request URL to be sent to the customer to pay the request amount.
Mandate Activation – Simulation Steps
In step 5 above, a billing request is created in GoCardless. This request must be fulfilled to initiate the first payment, set up a mandate, and then simulate its activation.
Data Required for Simulation: Mandate ID
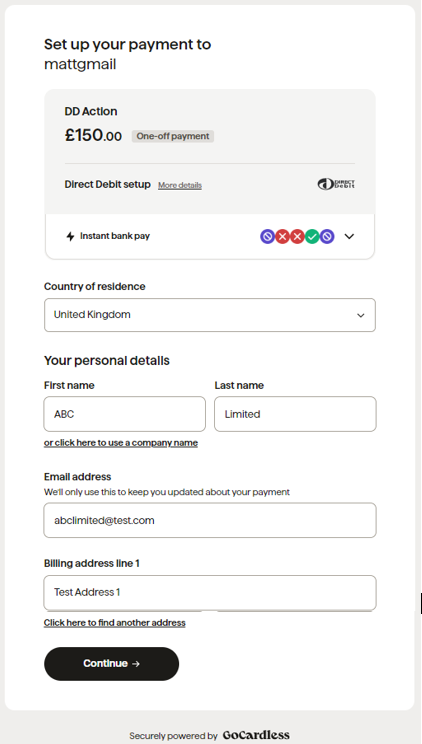
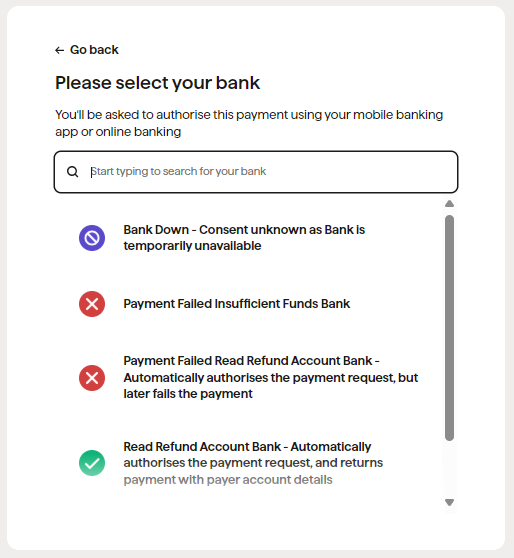
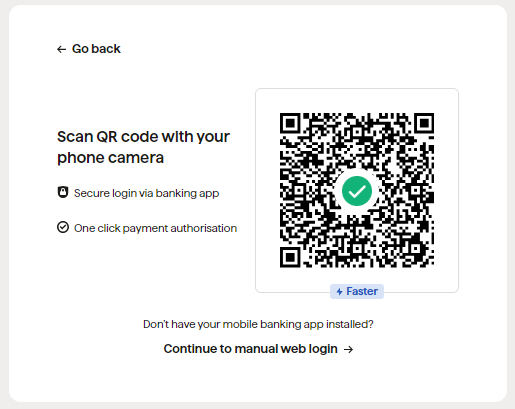
- Run the Billing Request URL in the browser and fill in the customer details and choose the correct bank depending on the required outcome of the simulation.
- Click on Set up this Direct Debit and finish the process by clicking Continue to manual web login
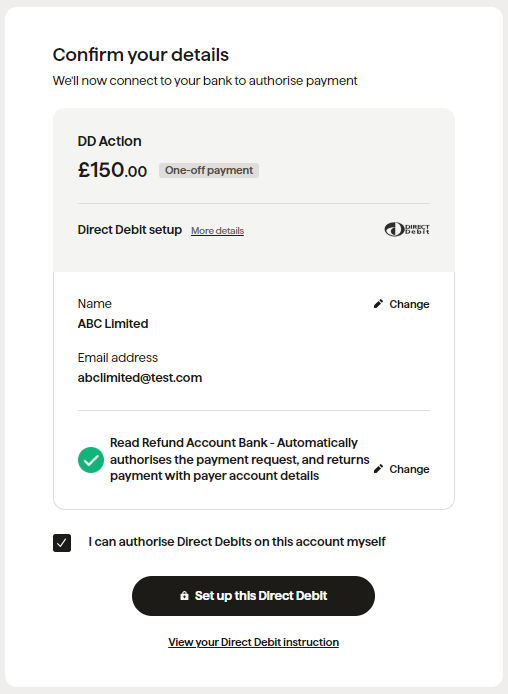
- A payment is created in GoCardless and the payment status is updated in Business Central.
- Simulate the mandate activation. See Activate a Customer Mandate.
Creating a Direct Debit Payment
When issuing a Sales Document in Business Central that is enabled for DDM processing, and a Direct Debit Mandate is selected, a payment is created using the mandate selected in the invoice.
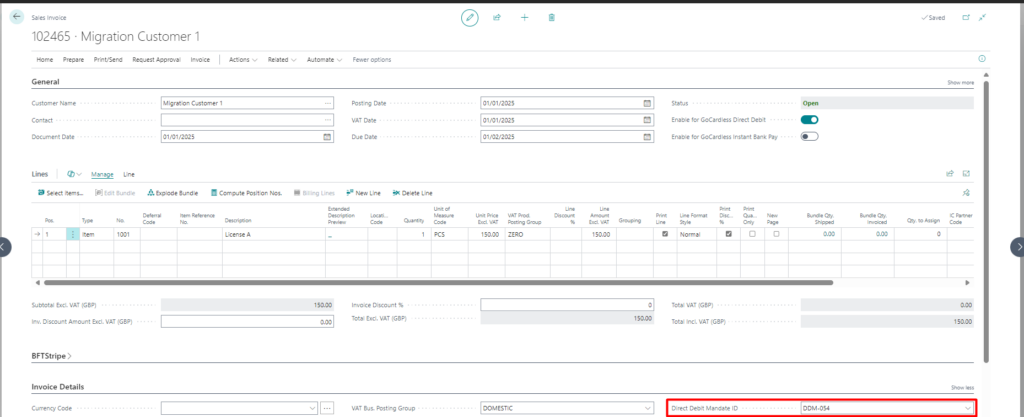
- Create a Sales Invoice as per standard Business Central
- Switch on Enable for GoCardless Direct Debit Mandate. The field Direct Debit Mandate ID in the invoice is filled in.
- Post the Sales Invoice as per standard Business Central. If posting is successful and the payment request has been successfully created, a confirmation message is returned.
- Navigate to the GoCardless Payments screen to see the payment record that was created and click on Post Payment Action.
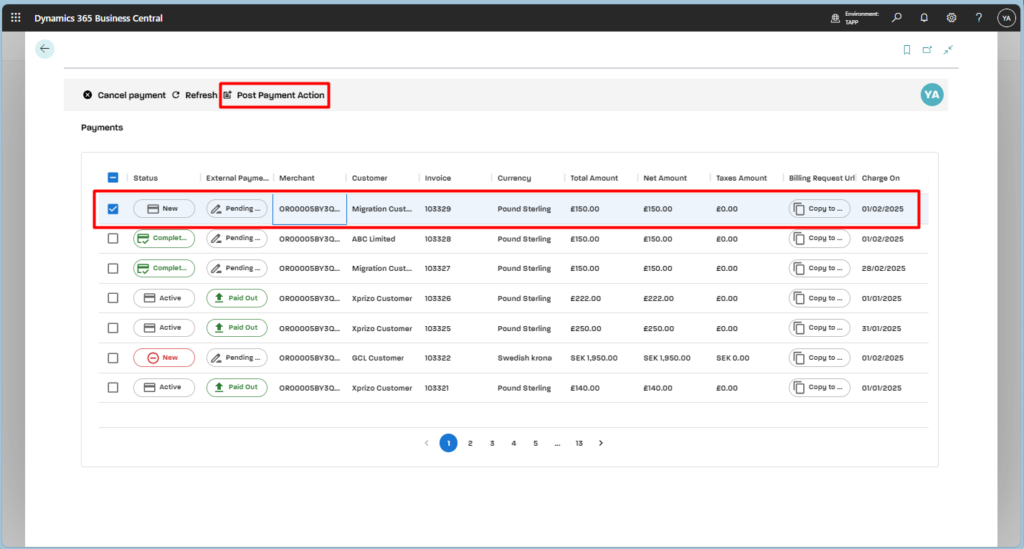
- Open the payment record (double-click on the payment) to view the payment information – you can see the GoCardless Payment ID.
Payments – Simulation Steps
In step 5 above, a payment is created in GoCardless and this is to be simulated as paid out or failed.
Data Required for Simulation: Payment ID
Simulate the payment process as Paid Out or Failed.
- For successful processing see: Payout a Payment
- For failed processing see: Fail a Payment