Introduction
This article explains how you can get Stripe for Microsoft Dynamics 365 Business Central – TAPP deployed and configured in your Microsoft Dynamics 365 Business Central environment.
Contact Bluefort support on support@bluefort.io if you have any questions.
Pre-requisites
The following prerequisites must be met to ensure the successful installation of Stripe for Microsoft Dynamics 365 Business Central – TAPP. This section provides an overview of the pre-requisites necessary to proceed.
- A Business Central SaaS Environment deployed and running on the latest Business Central version. We currently do not support on-premises deployments of Business Central.
- Credentials for the Stripe Account/s to onboard. Ideally, you should have credentials for both a Sandbox and a Production environment.
- Identify a Payment Success URL and Payment Cancel URL to set for the Stripe Account that will be onboarded to Business Central. These parameter URLs can be modified after they have been defined during the initial onboarding.
- Payment Cancel URL: this is the web page your customers will be re-directed to once the payment has not been successful.
- Payment Success URL: this is the web page your customers will be re-directed to once the payment has been successful.
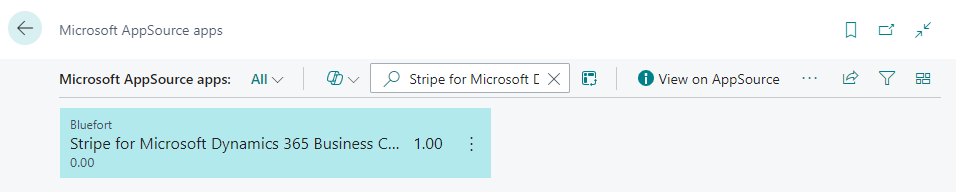
Obtaining the application
Stripe for Dynamics 365 Business Central – TAPP application is downloadable from Microsoft AppSource which can either be accessed via https://appsource.microsoft.com/ or from within Business Central as per below;
- From within Business Central
- In your Business Central environment navigate to the ‘Extension Management’ page.
- From within the page menu, click on ‘Appsource Gallery’.
- Search for the app by name and click on “View on AppSource”.
Installation
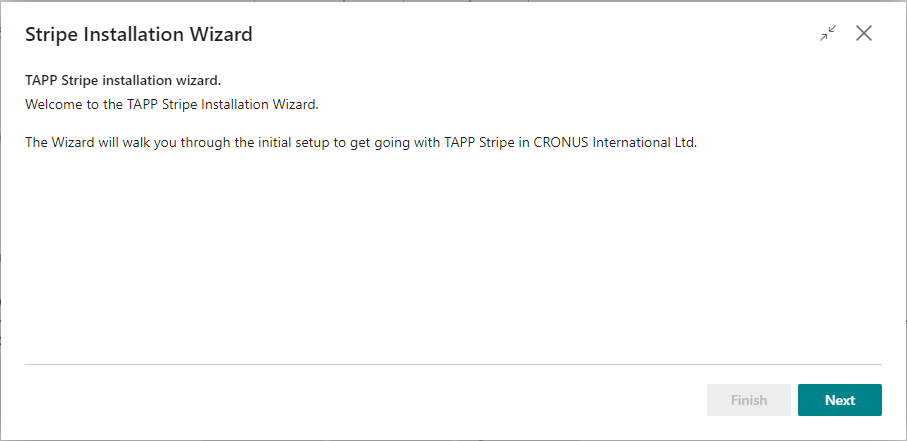
Installation Wizard
When the appication is successfully installed, run the Installation Wizard that will walk you through the initial setup to get going with TAPP Stripe in the currently opened company.
Step 1
The first screen in the wizard is the Welcome screen, designed to initiate the configuration process.
Click on Next to proceed.
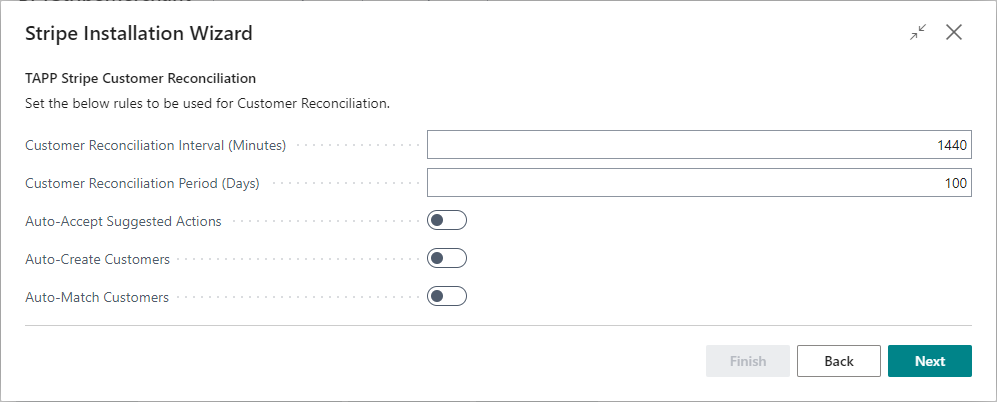
Step 2
In this step, the parameters concerning Stripe Customer Reconciliations are to be set. Below are the parameter definitions.
Step 3
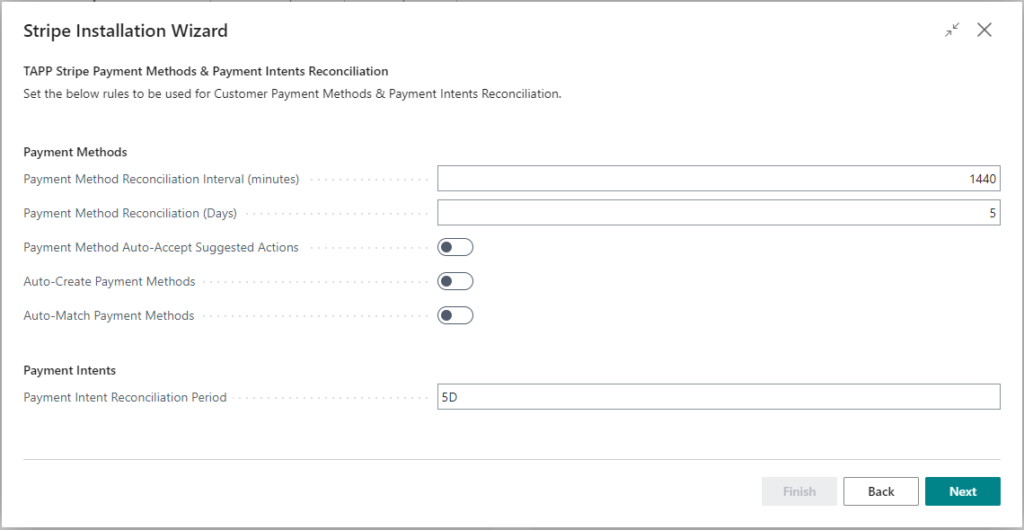
In this step, the parameters concerning Stripe Customer Payment Methods & Payment Intents Reconciliation are to be set. Below are the parameter definitions.
Step 4
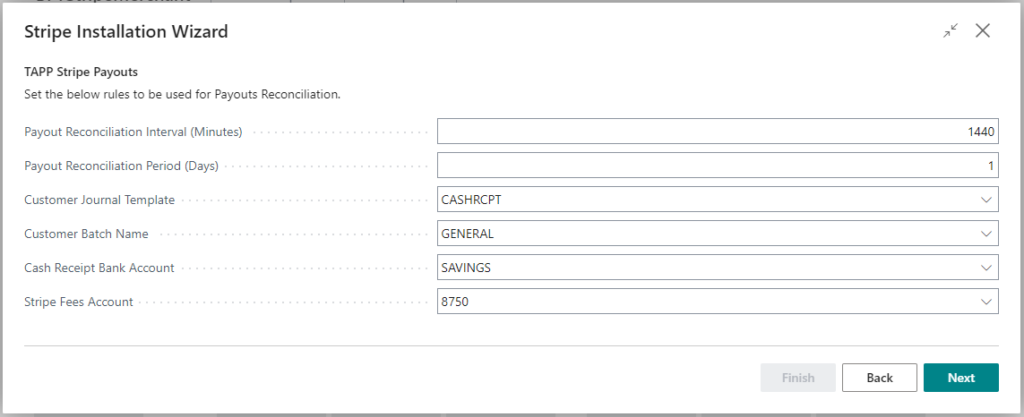
In this step, the parameters concerning Stripe Payouts Reconciliation are to be set. Below are the parameter definitions.
- Payout Reconciliation Interval (Minutes): Specifies the interval of the job running the reconciliation in minutes. Example: inputting 1440 means payout reconciliation will run daily.
- Payout Reconciliation Period (Days): Specifies the period of days to reconcile the stripe payouts. Example: inputting 5 means that the payout reconciliation will capture payouts created in Stripe in the last 5 days.
- Customer Journal Template: The Cash Receipt Journal Template to use when processing payouts.
- Customer Batch Name: The Cash Receipt Batch Name to use when processing payouts.
- Cash Receipt Bank Account: The default Bank account to use in the Cash Receipt Journal when processing payouts.
- Stripe Fees Bank Account: The G/L account to use when recording Stripe fees during payout processing.
Step 5
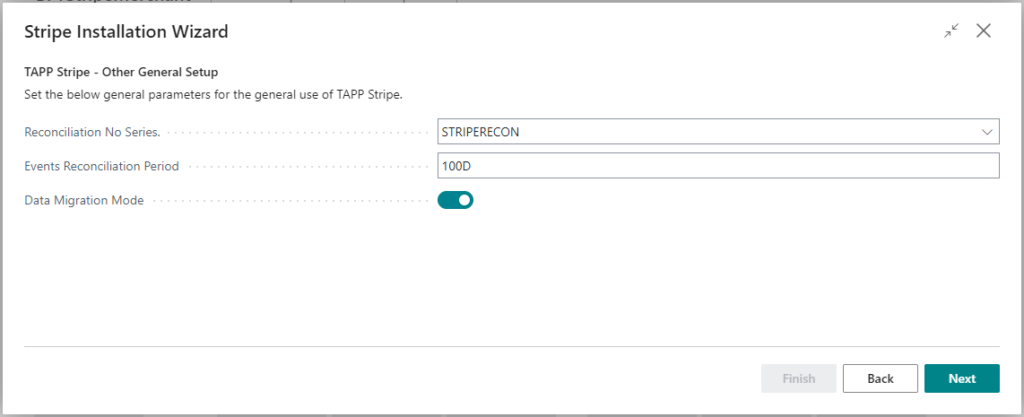
In this step, general Stripe parameters are to be set. Below are the parameter definitions.
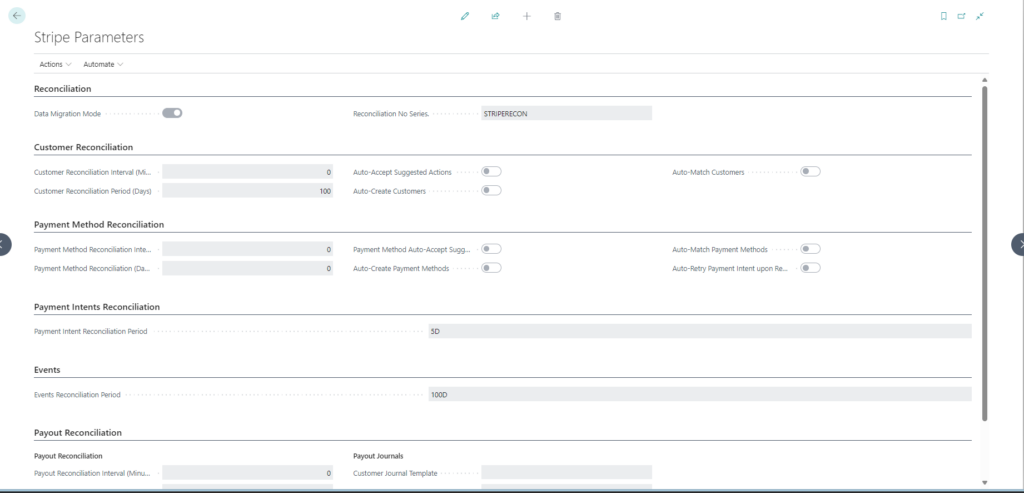
- Reconciliation No. Series: The Business Central No. Series to use for reconciliations of Stripe data.
- Event Reconciliation Period: Specifies the date formula (see more here) to consider when reconciling Stripe Events. Example: inputting 5D means that the events created in the last 5 days in Stripe will be captured to update the related records in Business Central.
- Migration Mode: This indicates whether TAPP Stripe for MS Dynamics 365 Business Central is in Migration Mode. In this mode, the application behaves differently during reconciliations as when running the latter, all the related Stripe data is retrieved and auto-reconciliation is disregarded.
Step 6
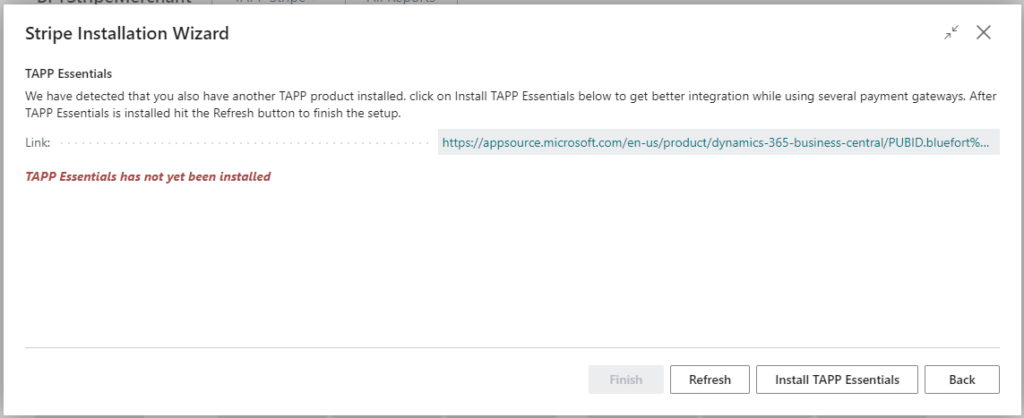
N.B. This step is only visible if TAPP GoCardless for Dynamics 365 Business Central is already installed. If you do not use this application, this step will not be shown and you can click on Finish to complete the wizard.
When both TAPP Stripe and TAPP GoCardless for Dynamics 365 Business Central are used, an itermedial application named TAPP Essentials is required in order to harmonize the operations between the two apps.
- To install TAPP Essentials click on Install TAPP Essentials to trigger the installation.
- Once installation is complete, click on Refresh to confirm that the app has been successfully installed.
- Click on Finish to complete the wizard.
All the parameters set during the installation, can be reviewed and changed by accessing the Stripe Parameters screen.