
This page provides step-by-step guidance for setting up and configuring bluefort’s BC – Dataverse Integrator in your environment.
Pre-requisites
To successfully deploy this product, make sure that;
✅ You have a Microsoft Dynamics 365 Business Central SaaS environment deployed.
✅ The Bluefort BC Dataverse Integrator application (extension) has been installed in the Business Central Environment being set up.
✅ Azure App Registration has been created – see more details here.
✅ A Dynamics 365 Application User has been created – see more details here.
✅ The BC Dataverse Integrator Azure Function has been deployed from the Azure Marketplace – see more details here.
Complete the Integration Foundation Setup
- Navigate to the Integration Foundation Setup
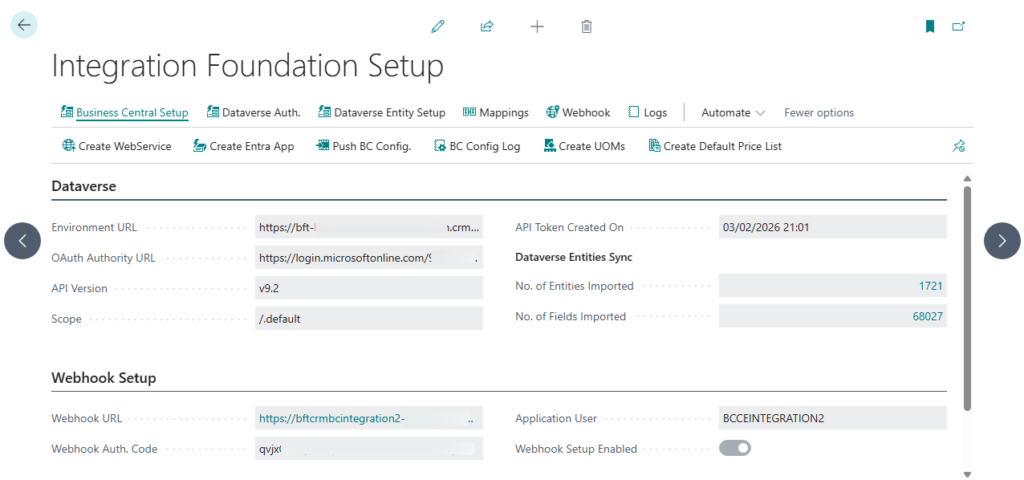
- Fill in the fields in the Dataverse section as follows:
- Environment URL – the Dataverse environment URL in the format https://[environment].[region].dynamics.com
- OAuth Authority URL – https://login.microsoftonline.com/[tenantID]/oauth2/v2.0/token
- API Version – value should always be set to v9.2
- Scope – value should always be set to /.default
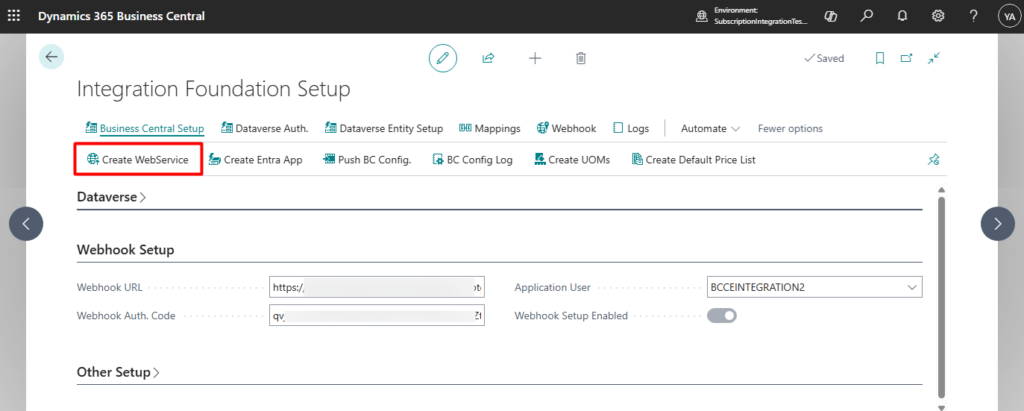
- Fill in the fields in the Webhook Setup section as follows;
- Webhook URL – Insert the URL where webhooks should be received. In this case this should be the Azure Function URL which can be retrieved from the Azure Portal.
- Webhook Auth. Code – Insert the webhook authentication code of the Azure Function that can be retrieved from the Azure Portal.
Set the App Registration Client ID and Client Secret
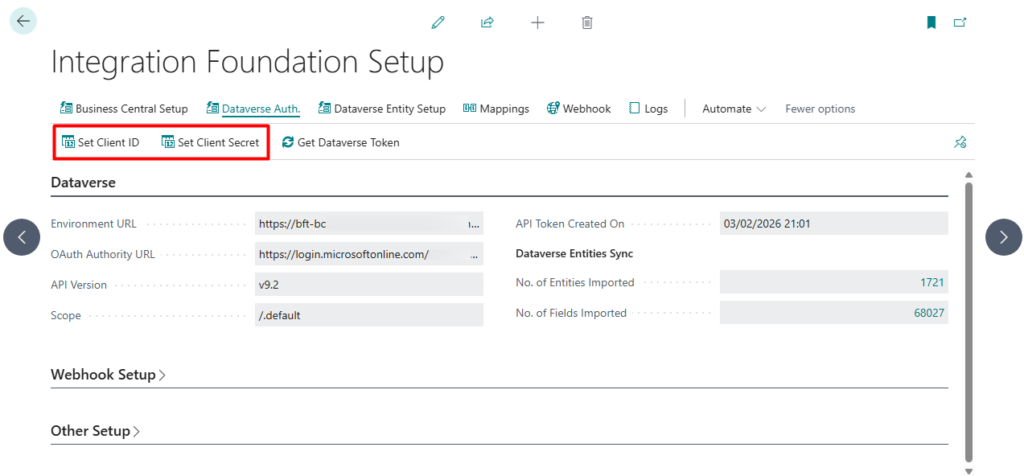
- Navigate to the Integration Foundation Setup
- Under the Dataverse Auth. section in the menu, click on Set Client ID and insert the App Registration’s Client ID in the popup window.
- Under the Dataverse Auth. section in the menu, click on Set Client Secret and insert the App Registration’s Client Secret in the popup window.
Create the Entra Application
- Navigate to the Integration Foundation Setup
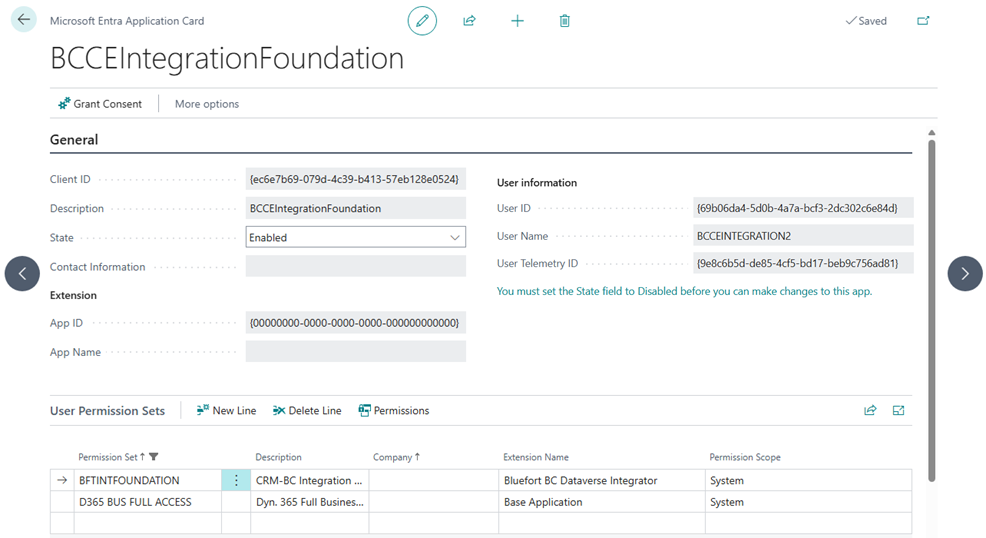
- Under the Business Central Setup section in the menu, click on Create Entra App
- Navigate to the Microsoft Entra Applications list in Business Central and find the application created with the name BCCEIntegrationFoundation
- Ensure that the application has the following permission sets;
- BFTINTFOUNDATION
- D365 BUS FULL ACCESS
- Any other permission set required to interact with data that will be exchanged via the integrator.
- Click on Grant Consent (action on the page menu) on the application – this step should be done by a tenant admin account. (If no tenant admin account has access to Business Central, any user can click the Grant Consent button and share the URL of the browser window that opens automatically).
- Ensure that the Entra Application has the status set to Enabled
Assign the Application User
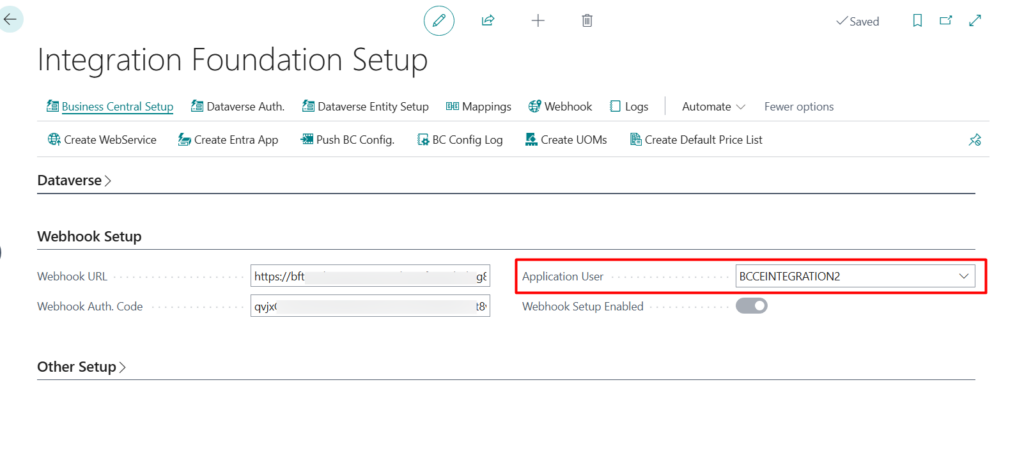
- Navigate to the Integration Foundation Setup
- Select the Application User created in the previous step under the Webhook Setup tab.
Create Web Services
- Navigate to the Integration Foundation Setup
- Click on Create WebService under the Business Central Setup tab
- Navigate to the Web Services page and confirm that the below web services have been created and published

Enable Job Queues
Upon installation a job queue with Description set to refresh Dataverse Token is automatically created.

This Job Queue should be set to status Ready and should run on a User that has the BFTINTFOUNDATION permission set assigned.